Acrylic nail drill bits explained | When it comes to nails, there’s no denying that one of the most important tools in your arsenal is an acrylic nail drill bit. These specialized bits allow you to create detailed and intricate designs on a variety of surfaces – something that can’t be achieved with regular nail files or clippers. But just what are these mysterious little tools? Read on to learn more about acrylic nail drill bits and how they can help you create something truly unique.
What are acrylic nail drill bits?
Acrylic nail drill bits are tiny, specialized tools designed to create detailed and intricate designs on a variety of surfaces. They come in a wide range of sizes and shapes, and can be used for anything from sculpting nails to creating intricate patterns. The drill bit itself is usually made from carbide, a material that’s incredibly hard and resistant to wear. This makes it perfect for the tough job of drilling into acrylics.
The way these bits work is simple – they use high speed rotary action to cut into the material they’re drilling through. Depending on what kind of design you want to make (or how much pressure you’re putting on it) will determine the size and shape of your bit. A larger bit will make a deeper, more intricate design, while a smaller bit will create a shallower, less detailed one.
When it comes to the actual drilling process itself, acrylic nail drill bits can be used in combination with other tools such as sandpaper and polishing agents. This allows you to shape and sculpt your nails into whatever design you desire – whether that’s something simple or complex.
How do you use acrylic nail drill bits?
Using an acrylic nail drill bit is relatively straightforward, although there are a few steps you need to take in order to get the best results.
Before beginning, it’s important to make sure your nails are clean and free of any oils or debris. This will help ensure that the bit doesn’t slip or snag while drilling. You should also use the correct size and shape bit for the design you’re looking to create.
Once you’ve chosen your bit, start by using a slow speed setting as you begin drilling into your acrylics. as well as give you more control over how deep you drill. As you go, increase the speed setting as needed, but always keep a steady pressure.
After you’ve finished your design, it’s important to clean and care for your bit properly. Acrylic nail drill bits can be washed with soap and water and then dried off before being stored away.
Finally, if you’re looking for an even more detailed finish on your designs, many acrylic nail drill bits also come equipped with diamond-tipped edges. These help give your nails an extra smooth look and feel by buffing.
What kind of drill bit do you use for acrylic nails?
The type of drill bit you use for acrylic nails will depend on the specific design you’re looking to create. There are a variety of different shapes and sizes available, ranging from small and basic bits all the way up to larger and more intricate ones. Depending on your needs, it may be helpful to try out a few different types before settling on one that works best for you.
For instance, if you’re looking to make simple holes or curves, then a small ball-shaped bit would likely do the job perfectly. These come in a range of sizes and work well at creating even uniform cuts. If you want something more detailed or intricate however – such as designs with multiple curves and angles – then a cone-shaped bit may be the better option. These are slightly larger than normal bits and can help make smoother, more precise cuts into the acrylics.
Another type of drill bit specifically designed for use on acrylic nails is the tungsten carbide bit. These are incredibly hard and resistant to wear, which makes them ideal for specialised designs that require extra precision and control. They also hold their shape extremely well, so you don’t have to worry about your edges becoming too blunt or worn down with each use.
No matter what kind of design you’re looking to create, there’s sure to be an acrylic nail drill bit that’s perfect for the job. With a little research and experimentation, you can easily find the perfect tool for transforming your nails into whatever shape or look you desire. And with proper care and maintenance, these bits should last for many years of beautiful designs!
Techniques for using an acrylic nail drill bit
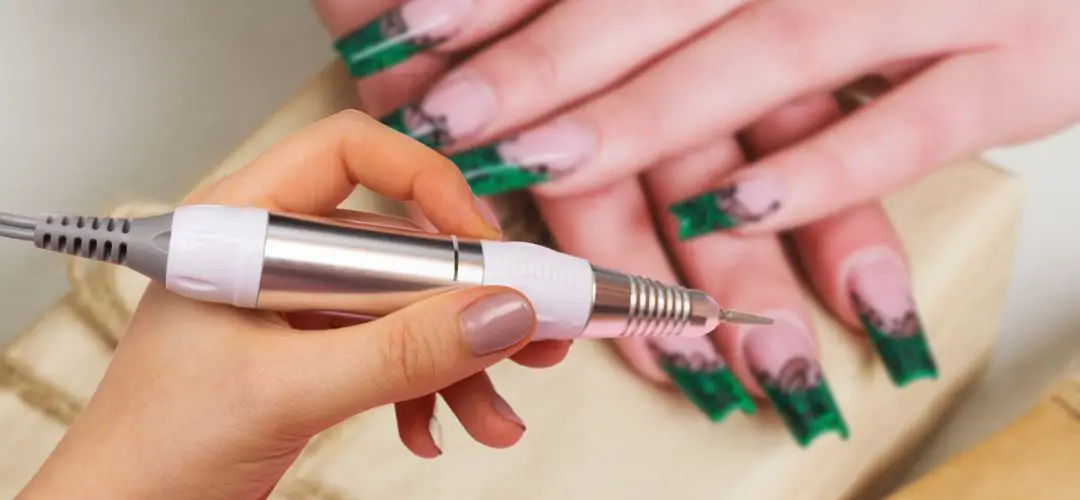
Using an acrylic nail drill bit is a great way to create beautiful and intricate designs on your nails without having to go to a professional. However, it’s important to understand the basics of how these tools work before you start using them. Before you begin, make sure that the bit is properly secured in place. You should also check the speed settings on your machine.
How to do your own acrylic nails with drill?
Start by placing the acrylic nail over a flat surface and securing it in place. Make sure that the bit is firmly attached to the drill before switching it on and that the speed setting is set to the lowest level. With light pressure, slowly begin drilling into the acrylic – remember to move at a steady pace for more precise cuts. To get a smooth finish on curved edges, try using a drill bit with a tapered tip. If you are planning on filing any rough edges, after drilling use a diamond-tipped bit as this will ensure a smoother finish.
After your nail is complete, remove any excess acrylic with an emery board and file the edges to create a professional look. Finally, apply some cuticle oil to nourish the nails and make sure they are completely dry before adding any colour or top coat.
Conclusion | Acrylic nail drill bits explained
This article provides an overview of the different types of drill bits used for acrylic nails, as well as safety precautions and tips on how to do your own acrylic nails with a drill at home. The type of bit chosen will depend on the size, shape and design desired; coarse bits are best for removing large amounts of acrylic quickly, while finer bits are better suited for creating detailed designs or curved lines. Additionally, diamond-tipped bits are great for achieving a smooth finish. Once the drilling is complete, use an emery board to remove any excess acrylic and file the edges for a professional look. Finally, apply cuticle oil to nourish the nails and ensure they are completely dry before adding any colour or top coat.