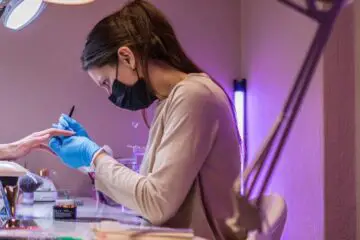
How do you clean a nail drill machine? | You know you need to keep your nails looking their best, but have you ever considered what it takes to get that perfect manicure? A clean nail drill machine is an essential part of the process. But how do you clean a nail drill machine with its many intricate parts and tiny crevices? Don’t worry – we’ve got you covered. Read on to find out the best way to keep your nail drill machine clean and ready for use. Here’s to perfect nails!
What is the best way to clean nail drill?
Start by unplugging the machine. Then, use a soft brush to remove any dust or dirt from the exterior of the machine. Next, open up your nail drill and clean each part with a damp cloth. Be sure to get into all those small crevices and make sure you’re removing any bits of dirt or grime. Once the exterior is clean, you’ll want to focus on the bit. Use a cotton swab dipped in rubbing alcohol to gently remove any buildup or residue from the bit. Finally, put everything back together and plug your machine in to test it out!
Can I use rubbing alcohol to disinfect nail tools?
Absolutely! Rubbing alcohol is a great way to disinfect your nail tools. Not only does it make sure that bacteria and other germs don’t spread between clients, but it also helps keep your tools in top condition. Before each use, make sure to clean your tools thoroughly with rubbing alcohol to ensure they are free of dirt and debris.
Make sure you use the correct strength of rubbing alcohol – usually 70% is best for cleaning purposes. If the solution is too strong, it can damage the surface of some materials, so always take care when applying it. Start by using an old toothbrush or small brush to remove any dirt from the tool before dipping it in the solution. Let sit for 20-30 seconds before wiping the tool down with a damp cloth.
Once finished, dry the tool thoroughly before moving onto the next one. You can also use rubbing alcohol to disinfect any surfaces you’re working on, such as your workbench and surrounding area. Just make sure to wipe down these surfaces in between each client for optimal hygiene and safety.
With regular cleaning and disinfecting using rubbing alcohol, your nail tools will remain in top condition longer than ever before! So don’t forget – when it comes to cleaning and disinfecting your nail tools, nothing beats rubbing alcohol! Keep it handy at all times so you can keep your clients safe and healthy while giving them perfect nails every time.

Can you clean drill bits with water?
It is possible to clean your drill bits with water, but it’s not the most effective way. Water alone won’t be able to remove all of the dirt and debris that can accumulate on a drill bit over time. Therefore, it’s best to use a combination of water and another cleaning agent such as rubbing alcohol or vinegar in order to effectively remove any built up grime from your drill bits. Start by using an old toothbrush or soft bristled brush to remove any large pieces of dirt or debris from the surface of the drill bit. Then, soak the bit in warm soapy water for 10-15 minutes before taking it out and giving it a thorough scrubbing with a soft cloth or brush.
Once the drill bit is free of dirt and debris, you can use a cleaning agent like rubbing alcohol or vinegar to disinfect it. Simply dip a cotton swab in the solution and run it along the surface of the bit until any buildup has been removed. Then, give your drill bit one final rinse with warm water before drying it off completely.
How do you remove the gel from a drill?
Removing gel from a drill can be tricky, but with the right approach it is possible to do so without damaging the machine. The first step is to unplug your nail drill and remove any attachments or accessories such as bits, brushes, or sanders. Then, use a soft bristled brush to gently remove any loose dirt and particles from the body of the drill.Next, fill a bowl with warm water and add some dish soap for extra cleaning power. Dip a soft cloth in the mixture and use it to wipe down the entire surface of your nail drill. This will help loosen up any built-up gel residue that may be present on the machine. Once you’ve finished wiping down your nail drill, use a soft, dry cloth to remove any excess moisture.
Finally, you can use a cotton swab dipped in rubbing alcohol to scrub away any stubborn areas of gel residue. Rub the swab gently over the surface of your nail drill until all of the gel has been removed. Finish off by using a soft dry cloth to blot away any remaining residue and allow your drill to air dry before using it again! With regular cleaning and maintenance, you can keep your nail drills free from sticky buildup and working like new for years to come.
Conclusion | How do you clean a nail drill machine?
This article explains how to properly clean and disinfect a nail drill machine to keep your clients safe and healthy. It outlines the steps needed to remove dirt and debris from the tool, as well as using rubbing alcohol or vinegar to disinfect it. Additionally, the article covers how to remove gel residue from the machine using a combination of warm water, dish soap, and rubbing alcohol. Finally, regular cleaning and maintenance is recommended in order to keep your drill machine in optimal working condition.
Warning: Always unplug the nail drill and remove any attachments or accessories before cleaning. Additionally, never submerge your drill in water as this can cause damage to the machine. Finally, only use cleaning agents that are specifically designed for nail drill machines in order to avoid damaging them.