Ah, the age old question: How do I get those beautiful polygel nails? From Instagram influencers to Hollywood stars, everyone seems to be sporting these gorgeous nails. Well, you don’t have to be a celebrity or beauty guru to learn how to achieve this look – with a few simple steps, you can become a polygel nail master yourself! In this article, we’ll explain exactly what you need to do in order to give yourself amazing-looking polygel nails. So keep reading and soon enough you’ll be able to show off your own stunning manicure! Let’s get started!
First, prep your nails by clipping, buffing and pushing back cuticles. This will ensure the best possible results for your polygel mani. Next, choose a base coat to protect your nails from staining and help the polygel adhere better. Apply it to each nail and cure under a UV or LED light for 30 seconds – 1 minute.
Then it’s time to apply the polygel! Using a brush or spatula, scoop out some of the product and roll it into a ball before lightly pressing onto the nail surface. You’ll want to start at your cuticle line and work towards the free edge of the nail – when you’re happy with how it looks, press firmly to ensure adhesion and then use the brush to gently shape and smooth. Once you’ve done that, cure with a UV or LED light for 2 minutes.
You can now move onto your colour – choose whichever shade you like, apply it over the cured polygel and then cure again under the light for an extra minute. To finish off, apply a top coat of your choice and cure one last time before rubbing alcohol to wipe away any sticky residue. And voila – all done! You now have stunning polygel nails to show off! Have fun trying out different designs and colours, and enjoy your new mani!
How do you shape Polygel nails?
Shaping polygel nails is a breeze once you get the hang of it! Start by using the brush that comes with your polygel kit to evenly spread out the product across the nail bed. Then, use an electric or manual file to shape and refine your nail according to your desired look – round, pointed, almond-shaped etc. For extra sculpting power, you can also use cuticle nippers to trim down any excess product. And finally, buff away ridges as necessary before wiping with a lint-free cloth soaked in rubbing alcohol.
What is the best drill bit for removing Polygel nails?
The best drill bit for removing polygel nails will depend on the type of polygel used. Generally speaking, a medium to fine diamond burr is recommended. These bits are specially designed to quickly and safely remove the product from the nails.
How do you remove Polygel nails with a drill?
The process for removing polygel nails with a drill is similar to that of acrylics. Start by placing the diamond burr on the nail and setting it to low speed. Then, use light pressure to gently buff away the product until all of it has been removed. Finish off by using a lint-free cloth soaked in rubbing alcohol to wipe away any residue. With these steps, you’ll have no problems removing your polygel nails!
How long does a Polygel manicure take?
The average time for a polygel manicure is around 45 minutes to 1 hour. This will depend on the complexity of the design, as well as how quickly you complete each step. However, with practice and some patience, you can easily master the process and reduce your manicure time!
How long does it take to do Polygel nails at home?
Doing polygel nails at home will typically take a little longer than having them done in a salon due to the lack of professional equipment. Polygel is quite easy to work with though, and you can expect the whole process – from prepping your nails to applying the colour – to take around 1-2 hours. With some practice and patience, you’ll soon be able to master this fantastic technique!
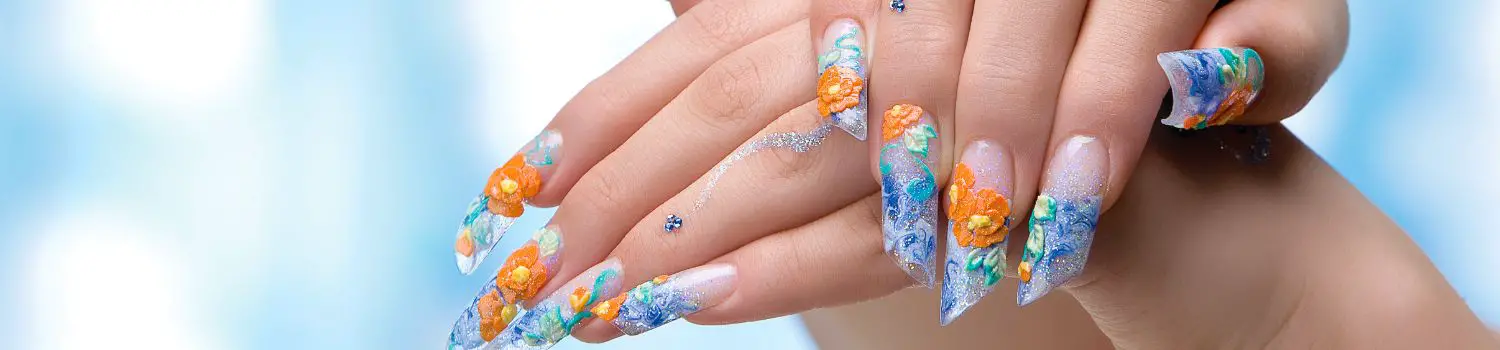
How do you make 3D nail art with Polygel?
Polygel is the perfect medium for creating 3D nail art! All you need to do is apply it to the nail surface in two layers – one thin and one thick. Then, use a brush or dotting tool to create your design. You can also use cutters and tweezers to help shape and refine your artwork. Finally, cure under a UV or LED light, buff away any ridges, wipe with rubbing alcohol and voila – stunning 3D nail art!
How long does Polygel last?
Polygel typically lasts up to 4 weeks with proper care. To get the longest-lasting results, be sure to seal off the edges of each nail before curing them and keep nails away from water as much as possible. Of course, you can always switch up the colour or design whenever you want to keep your look fresh – so enjoy your perfect mani as long as it lasts!
What is the difference between Polygel and acrylic nails?
Polygel nails are made from a combination of gel and acrylic powder, giving them a more flexible feel than traditional acrylics. They also require less filing and sculpting compared to acrylics due to their softer texture. Additionally, they tend to last longer with proper care and have lower odour levels than acrylics. In short: if you’re looking for a strong yet gentle manicure that won’t break the bank – polygel is the way to go!
What kind of nail files should be used with Polygel?
Generally speaking, using an electric or manual file to shape and refine your nails according to your desired look – round, pointed, almond-shaped etc. is recommended when working with polygel. For extra sculpting power, you can also use cuticle nippers to trim down any excess product. And finally, buff away ridges as necessary before wiping with a lint-free cloth soaked in rubbing alcohol. With this simple process and the right tools, you’ll be able to create perfect nail shapes for any design!
What is the best top coat for Polygel nails?
The best top coats for polygel nails are usually either gel or acrylic based. Gel-based top coats will help maintain the flexible nature of your nails and keep them looking shiny for longer; whereas, acrylic-based top coats provide a more durable finish. Both options will help to seal off the edges of each nail and act as a protective layer against everyday wear and tear.
How do you remove Polygel nails?
Removing polygel nails is relatively easy – all you need to do is soak them in acetone or an acetone-based remover for around 10 minutes. After that, gently scrape off the product with a cuticle pusher and finish up by wiping each nail with a lint-free cloth soaked in rubbing alcohol to wipe away any residue. With these steps, you’ll have no problems removing your polygel nails!
Conclusion | How to do polygel nails?
Polygel nails provide a flexible yet long-lasting manicure, and can be easily created at home using the right tools. The process typically takes around 1-2 hours and requires minimal filing and sculpting. With a gel or acrylic based top coat, you’ll be able to maintain your perfect mani for up to 4 weeks. Polygel is also easy to remove – just soak the nails in acetone for 10 minutes before scraping off the product with a cuticle pusher and wiping away any residue with rubbing alcohol. So why not give Polygel a try today? It’s the perfect way to upgrade your nail game!