For a manicure salon and also for the private sector, a nail drill is an indispensable tool. It can help you achieve professional-looking results in no time, and it’s also easy to use – once you know how. In this article, we’ll show you everything you need to know about using a nail drill, including what it offers, the different types available, how to use your drill safely, and how to get the best results from it.
how to use a nail drill?
Whether you’re a professional nail technician or just looking to pamper yourself at home, knowing how to use a nail drill is essential for getting the best results. Here are some tips on using your nail drill effectively and safely:
Start by choosing the right bit for your needs. Different bits are designed for different types ofIf you are a professional nail technician, choosing the right nail drill for your salon is an essential first step in providing quality services to your clients. There are many different factors to consider when selecting a nail drill, such as the type of work you plan to do with it, the power level that you need, and the features that are most important to you.
To pick the best nail drill for your salon, start by considering what kind of work you’ll be doing with it. If you are planning to use it primarily for regular manicures and pedicures, then a basic model may be all you need. But if you plan to use it for more advanced techniques such as acrylics or gels, then you may want to consider a model with a more powerful motor that can easily handle these materials.
You should also think about what kind of power you need from your nail drill. Nail drills typically come in either corded or battery-powered models, and both have their advantages and disadvantages.
A few tips and tricks for getting the most out of your nail drill include:
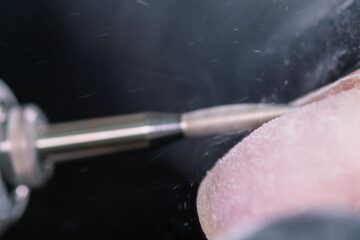
1. Always be sure to use proper safety gear, such as gloves and protective eyewear, when using your drill. This will help protect you from any potential injuries or accidents that can occur while using this powerful tool.
2. Start slowly when using your nail drill, especially if you are new to using it or are working with sensitive materials like acrylics or gels. By taking your time and being patient, you will reduce the risk of damaging your nails or causing other unwanted side effects.
3. Experiment with different speeds and pressures to find what works best for you. Don’t be afraid to try out new techniques or attachments to see how they can improve your results.
4. Always keep your nail drill clean and well-maintained, both between uses and after completing a job. This will help reduce the risk of any build-up or other contaminants that could impact its performance over time.
knowing how to use a nail drill
Whether you are a professional nail technician or just doing some pampering at home, knowing how to use a nail drill is essential for getting the best results. A good drill can make it quick and easy to apply artificial nails, while also helping you achieve beautiful natural nails as well. To use your drill effectively and safely, start by considering what kind of power level you need from your tool. There are two main options: corded drills, which require an outlet nearby during use, and battery-powered drills, which can be more convenient to use and can sometimes offer more power.
Next, look for a drill that has the features you need most, such as built-in light sources or multiple speed settings. Once you have your drill, take your time when using it, experimenting with different techniques and speeds to find what works best for your needs. And above all, always keep your tool clean so that it continues to perform well in between uses!
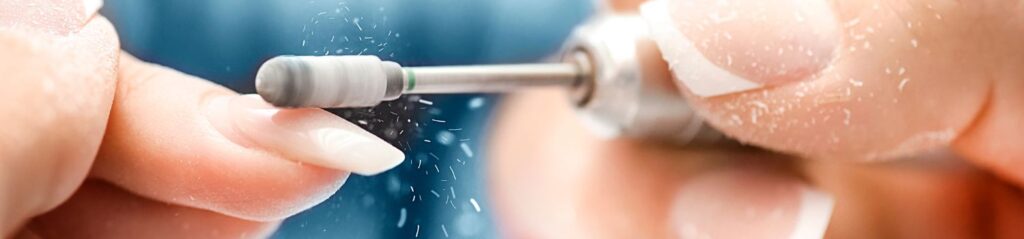
Before starting a manicure or pedicure treatment with your nail drill, it is important to choose the right bit for the job. Different bits are designed for different types of work and materials for example, a coarse sanding bit may be better suited for removing thick layers of acrylic, whereas a fine polishing bit may be better for smoothing out your natural nails.
In addition to choosing the right bit for the task at hand, you should also take proper safety precautions when using your drill, such as wearing gloves and protective eyewear while working.
Once you have your nail drill set up and ready to go, you can begin the manicure or pedicure process by gently filing down your nails using the coarse sanding bit. This will help smooth out any rough edges or unevenness on your natural nails and prepare them for further work.
Next, you can use a softer bit to shape your nails as desired. Depending on the look you are going for, this may involve rounding off the tips of your nails or creating more defined curves along their sides.
After shaping your nails, it is typically necessary to apply some sort of base coat in order to protect them from potential staining or other damage while using more intensive tools such as acrylics or gels. Once this has been applied, you can move on to the fun part using your nail drill to apply the acrylic or gel of your choice!
There are many different attachments and settings that can be used depending on what effect you want to achieve, so it is a good idea to experiment with different speeds and pressures until you find what works best for your nails.
Finally, once all of your manicure or pedicure work is complete, make sure to clean off any dust or residue left over from using the drill. This will help keep both your tools and nails in good condition going forward. With proper care and maintenance, you should be able to enjoy beautiful nails for weeks or even months at a time!
How do I know my drill strength?
When choosing a nail drill, one of the most important considerations is the strength or power that your tool can offer. There are two main options available: corded drills, which require an outlet nearby during use, and battery-powered drills, which can be more convenient to use and may sometimes offer a greater degree of power.
Before deciding which type of drill to buy, take some time to consider how often you plan on using it and what sort of projects you will be working on. If you are planning on doing lots of intensive treatments such as acrylics or gels frequently at home, then a battery-powered model may be best suited for your needs.
On the other hand, if you only need your drill periodically or will primarily be using it for basic filing and shaping tasks, then a corded model may be more convenient overall.
In addition to the type of power your drill offers, you should also consider what other features it comes with.
For example, some drills come equipped with built-in light sources that can help illuminate your work area, while others offer multiple speed settings that allow you to adjust the intensity of your work depending on the task at hand.
If you will be using your drill frequently or performing intricate procedures such as detailed nail art designs, these kinds of added features may be very useful to have. However, if you plan on keeping your drill mainly for basic filing and shaping tasks, they may not be necessary.
What is the best Watt for nail drill?
There is no definitive answer to this question, as the ideal level of power or wattage for a nail drill largely depends on the types of projects you will be working on. For example, if your main goal is to do intensive treatments such as applying acrylic nails or gels at home, then you will likely need a more powerful model with a higher wattage. However, if you are mainly looking for a tool that can simply help keep your natural nails in shape and trim down any rough edges using softer bits, then you may only need something basic that offers less power. Before choosing a wattage level to work with, consider what sort of procedures you plan on doing most often and make sure to select a drill that can handle these tasks effectively.
which way should you file your nails?
There are two main schools of thought when it comes to how to file your nails. Some people believe that the best method is to use a filing motion that follows the natural curve of your nail, while others prefer to take an alternate approach and file in just one direction from top to bottom. Ultimately, there is no clear “right” way to file your nails, and what works best for you will depend largely on personal preference. However, if you are still not sure which method is best for you, it may be worth trying both techniques out to see how they feel. Once you find the motion that feels most comfortable and offers the smoothest results, stick with it!
how to use a nail drill on natural nails?
If you are new to using a nail drill, it can be helpful to start with some simple tasks before moving on to more complex procedures. For example, try beginning by trimming and shaping your nails as needed with one of the softer bits included with your tool. Once you have mastered these basic steps, you can then begin experimenting with other types of materials or performing more intensive treatments such as applying acrylics or gels. During this process, be sure to find a comfortable workstation and position your drill so that you can easily access the area around your nails. Also, be sure to use caution when handling the tool and keep your hands away from the bit at all times for safety.
how often should you file nails?
Most people will only need to file their nails every few weeks or so in order to keep them looking and feeling healthy. However, if you are committed to maintaining a high level of nail care, you may want to consider experimenting with certain at-home treatments such as acrylics or gels. Depending on the type of product used and how often you apply it, you may need to invest in a new set of nails every few weeks or so. With the right nail drill and a little bit of practice, you can enjoy beautiful nails that will last for weeks or even months at a time.
In conclusion
If you are looking for a tool to help keep your nails in shape, a nail drill may be a good option. Nail drills come with a variety of speed settings that allow you to adjust the intensity of your work, depending on the task at hand. Before choosing a wattage level to work with, consider what sort of procedures you plan on doing most often. If you are new to using a nail drill, start by trying some simple tasks such as trimming and shaping your nails. With a little bit of practice, you can then begin experimenting with other types of treatments or materials.