How do I shorten my nails with a nail drill? | Are you fed up with long and unruly nails? Fed up of fighting with nail clippers, scissors, or files just to tame them? Well fret no more! With a nail drill, you can easily shorten your nails in no time! In this article, we will give you the low-down on how to use a nail drill to get your nails looking perfectly groomed and well-manicured. So sit back and let us show you the way! Ready? Let’s go! 😉
How do you shorten your nails with a drill?
1. Start by gathering your supplies: a nail drill, an emery board or a file, and some cuticle oil (optional).
2. Begin by washing your hands thoroughly with soap and water to remove dirt,.
3. Select the correct sized bit for the job—if you’re trimming down your natural nails, use a small-sized bit; if you’re filing acrylics or gel nails, use a larger size bit.
4. Place the selected bit into the chuck of the drill and tighten it securely using the key tool provided with the drill.
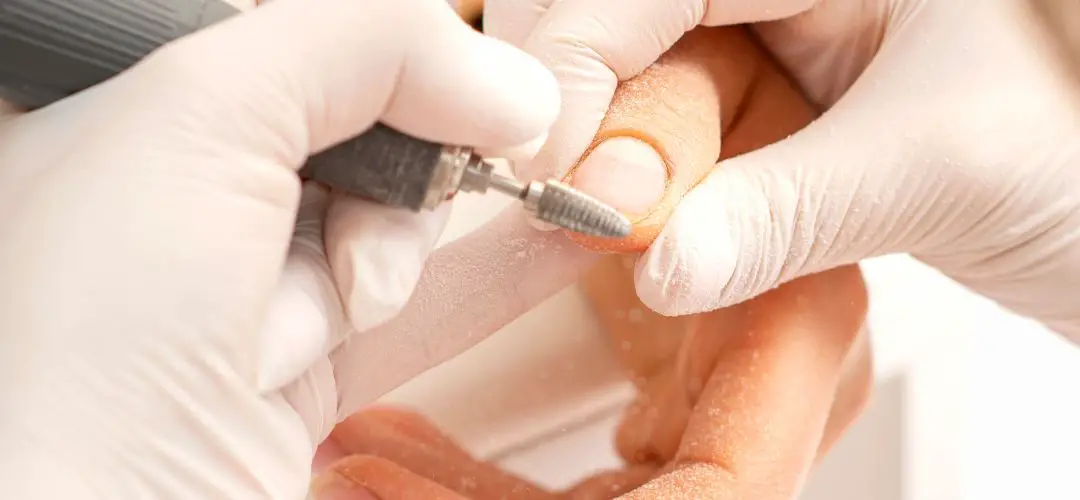
5. Securely hold one finger in place then start up the drill at a low speed (around 1,500-2,000 rpm).
6. Gently move the bit over the nail in small circles to slowly and evenly cut away the layers of your nails until you reach the desired length.
7. Once done with one finger, release it and repeat steps 5-6 on all other fingers.
8. File or buff your nails with an emery board to achieve a smooth finish.
What type of bit should I use?
The type of bit used for shortening nails with a drill depends largely on the type of nail you have. If you have natural finger nails, a small-sized bit is perfect—it will allow you to slowly and evenly cut away layers of your nails until you reach the desired length.
However, if you’re filing acrylics or gel nails, then it’s best to use a larger size bit as these types of nails are more durable than natural ones. A larger sized bit will also ensure an even and smooth finish when removing product from the nail bed.
When using a nail drill, it’s important to select the correct type of bit for the job in order to achieve professional -looking results. Common types of bits used include diamond bits, carbide bits, and ceramic bits.
Diamond bits are the most popular type of bit for nails, as they can last longer than other types due to their durable construction. They are also ideal for filing acrylics or gel nails as they offer more control over the speed and pressure applied to the nail.
Carbide bits are also a popular choice for nails, as they are very strong and can file both natural and artificial nails with ease. They come in various shapes, so they are ideal for creating detailed designs or filing away product from the nail bed.
How often should I shorten my nails with a nail drill?
It’s important to remember that using a nail drill should be seen as part of your regular nail maintenance routine, not as an occasional treat. As nails grow back relatively quickly, it’s best to keep them short and neat on a regular basis in order to maintain their appearance.
For natural nails, you should aim to shorten them every two or three weeks. This will depend on how fast they grow and how well-maintained they are. If you notice that your nails become uneven, then it may be time for a trim.
If you are wearing acrylics or gel nails, then the frequency of clipping could vary depending on the type of product being used. Typically these products will last for up to three weeks before needing to be refilled or replaced. It’s best to check with your technician on how often the nails should be clipped in order to maintain the desired look.
No matter what type of nail product you are using, it’s important to follow a regular maintenance schedule in order to keep them looking neat and tidy. With a bit of practice and patience, you can become an expert at trimming your own nails with a nail drill!
How do I choose the right nail length?
Choosing the right nail length is an important part of having healthy and well-maintained nails. Even if you have a bit of experience with manicures, it’s still important to know how long your nails should be for each style or occasion.
For example, shorter nails are best for everyday wear as they provide more stability and durability when performing daily activities like typing or washing dishes. Longer nails can also be worn during special occasions such as weddings or proms, but they often require extra care in order to maintain their shape and structure.
When selecting the appropriate nail length for yourself, there are a few factors that you should take into consideration:
– The shape of your hands – longer nails may look out of proportion on smaller hands.
– The type of activity you will be doing – shorter nails may be more suitable for activities that require precision or manual dexterity.
– Your lifestyle – if you work with your hands often, then short nails may be a better option as they are less likely to break and chip during strenuous tasks.
Ultimately, the length of your nails is up to personal preference and there’s no right or wrong answer when it comes to choosing the best length for yourself. It’s important to experiment and find out what works best for your lifestyle and look! With some practice and patience, you can become an expert at selecting the perfect nail length with a nail drill!
Which nail shape is more attractive?
There is no one-size-fits-all answer when it comes to choosing the most attractive nail shape, as different people have their own preferences and tastes. Some of the more popular shapes include round, square, almond, oval, stiletto and coffin.
Round nails are ideal for those looking for a classic look as they provide a simple and timeless aesthetic. They are also easier to maintain than other shapes due to their lack of sharp edges which can often snag on clothing or items around the house.
Square nails are great for those who want to make a bold statement as they give off an edgy yet sophisticated vibe. They can also help elongate short fingers by adding extra length and definition.
How do you cut evenly nail extensions?
When cutting nail extensions, it is important to take your time and use the right tools to achieve an even cut. Nail extensions are typically placed on top of natural nails, and when clipped incorrectly, can make them look uneven or jagged.
The first step in cutting nail extensions evenly is selecting the proper tool for the job. Traditionally, a pair of sharp scissors is used for this task; however, specialised clippers with curved blades can also be beneficial as they help prevent snagging or tearing of the extension material. If you are using a file to shape and smooth out any rough edges afterwards, then make sure that it has a fine grit.
Once you have your tools selected, the next step is to take a deep breath and steady your hand. When cutting the extension, start from the outside edge and work your way in towards the centre of the nail. Make sure to go slowly and use smooth even strokes. If you need to stop and take a break at any point, that’s perfectly fine – just make sure to pick up where you left off so that the final result is as seamless as possible.
With a bit of practice and patience, you can learn how to cut evenly nail extensions with a nail drill!
Does buffing your nails make them smooth?
Buffing is a great way to make your nails look smoother and more polished without having to resort to nail polish or other products. It can help even out any irregularities in the nail surface and leave them looking healthier, stronger and more vibrant.
When it comes to buffing your nails, there are a few tools that you will need: an electric nail file (or buffer), fine-grade sandpaper, a buffer block (optional), cuticle oil and a hand lotion. Start by filing down any sharp edges with the electric nail file or buffer; this helps create an even base for the buffing process. Next, use the fine-grade sandpaper to gently remove ridges and bumps on the surface of your nails – be sure to move the paper in circles, not back and forth.
Once ridges and bumps have been removed, use the buffer block (if available) to smooth out any remaining irregularities. Make sure to apply gentle pressure as you move the block in small circular motions – this helps create a natural sheen on your nails which can help make them look smoother. Finally, apply some cuticle oil or hand lotion to protect your skin from any dryness caused by buffing.
By following these steps, you can make your nails look smoother and more polished with a nail drill! Buffing is great for those looking for an easy way to get salon-style results without breaking the bank.
Is it better to use a nail drill or scissors/clippers?
At the end of the day, the answer to this question depends on what specific result you are looking for. Both nail drills and scissors/clippers can be used to trim and shape nails, but each has its own strengths and weaknesses depending on your needs.
When it comes to nail drills, these machines offer a powerful way to quickly trim and shape nails. They can be used for both natural and acrylic nails, making them extremely versatile in terms of their applications. Nail drills come with various attachments which allow users to customize their look by filing, buffing or polishing – something that simply cannot be achieved with scissors or clippers alone. In addition, electric nail files typically have an adjustable speed setting so that you can tailor your approach to different nail types.
On the other hand, scissors and clippers can also be used for trimming nails, but they require a more manual approach which some may find tedious. They are best suited for natural nails as their blades offer more precision when cutting extensions or shaping the edges. However, their lack of power makes them ineffective for acrylics – something that can be easily accomplished with a nail drill. Additionally, these tools do not offer any additional features like filing or buffing that a nail drill does.
Conclusion | How do I shorten my nails with a nail drill?
This article explains the differences between using a nail drill and scissors/clippers to trim and shape nails. Nail drills offer powerful, adjustable speeds that allow users to customize their look by filing, buffing or polishing. Scissors and clippers provide more precision when cutting extensions or shaping the edges but are limited in terms of their capabilities.