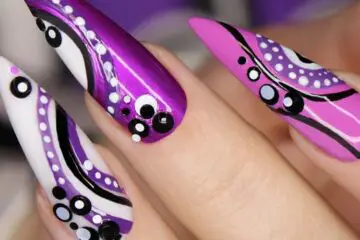
How to use a nail drill for dip powder? | Are you ready to give your nails a dazzling, long-lasting manicure? Dip powder may be the answer you’re looking for! And with the help of a nail drill, you can take your dip powder mani game to the next level. In this article, we’ll show you how easy it is to use a nail drill for dip powder so you can have the most beautiful nails that will last for weeks! Ready to get drilling? Let’s dive in!
What is a nail drill?
A nail drill is an essential tool for anyone interested in getting a high-quality, professional-looking manicure. It’s a power tool used to file and shape the nails quickly with precision and accuracy. With its help, you can easily buff, smooth and polish your nails so they look neat, healthy, and well-maintained.
How to use a nail drill for dip powder?
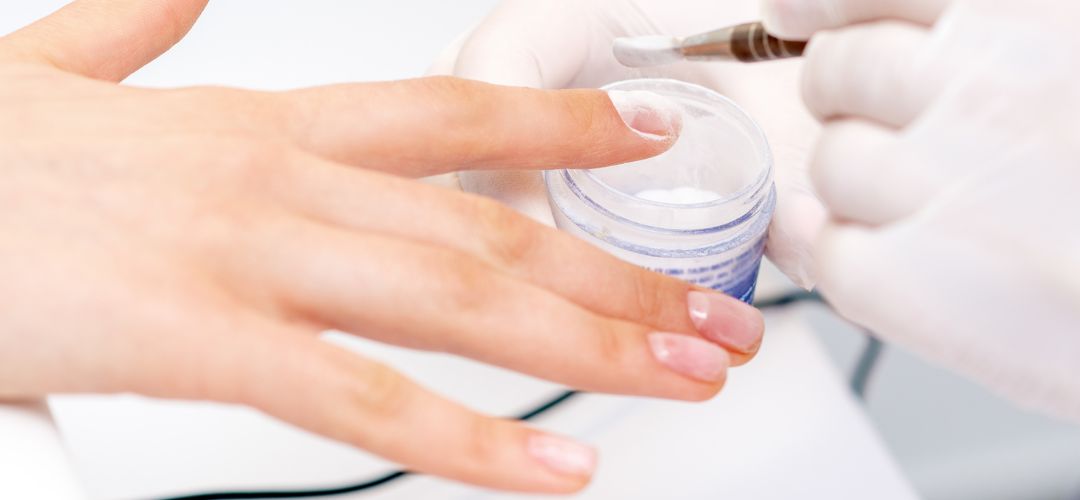
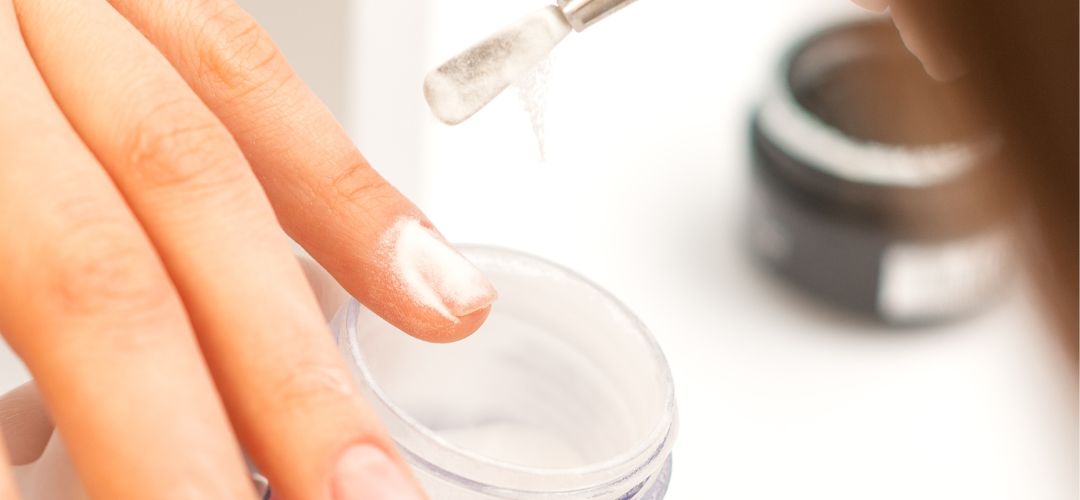
Using a nail drill for dip powder is relatively straightforward and easy, but it’s important you follow the right steps to ensure your mani looks perfect. Begin by prepping your nails – make sure they’re clean, trimmed, and filed down to the desired shape. Then, apply your base or primer coat, followed by a thin layer of dip powder.
What is dip powder?
Dip powder is an alternative to traditional nail polish that offers a long-lasting, stronger and more durable manicure. It’s made from finely ground acrylic polymers which are then mixed with activator solutions. The dip powder is applied in multiple thin layers and hardened using UV light or LED lamp. The end result is a glossy, salon-style finish that lasts for weeks without chipping or peeling.
Once the dip powder is applied, you can use your nail drill to buff and shape it. You should start at a low speed and gradually increase the speed as needed. Make sure to use high-quality bits that are specifically designed for dip powder nails.
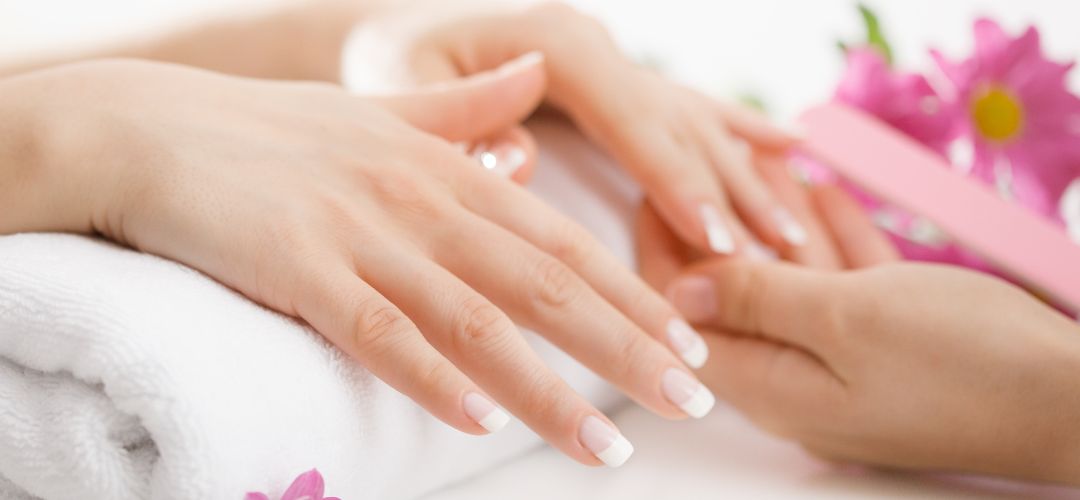
The last step is to apply a top coat for added protection and shine. This will help keep your mani looking beautiful for even longer. And voila – you have a gorgeous, professional-looking dip powder mani that will last for weeks!
How long does dip powder last?
Dip powder manicures are known for being long-lasting and durable, but exactly how long will your mani last? On average, dip powder manicures can last anywhere from two to four weeks with proper care and maintenance – much longer than a traditional nail polish!
When it comes to the longevity of your dip powder mani, there are several factors that come into play. Temperature and humidity levels, exposure to water and the quality of products used can all influence how long your dip powder mani will last.
Do I need a nail drill for dip powder?
Whether you’re a professional or an at-home nail enthusiast, you may be wondering if a nail drill is necessary for dip powder manicures. The short answer is yes – a good quality nail drill will help give your mani the perfect finish and ensure it lasts as long as possible.
Using your bare hands to buff and shape your dip powder nails can be a lengthy process, and it’s not always easy to get the perfect finish. A nail drill, on the other hand, makes buffing and shaping much faster and easier. It also helps to ensure that your dip powder is evenly cut so there are no lumps or bumps.
Does the speed of the nail drill matter for dip powder application?
Yes, the speed of your nail drill does matter when it comes to dip powder application. The right speed helps ensure that your manicure looks professional and lasts longer.
When using a nail drill for dip powder, you’ll want to start at a low speed and gradually increase as needed. Low speeds are great for buffing and shaping the dip powder, while higher speeds are best for filing. A good rule of thumb is that if you’re using a nail drill to buff or shape the dip powder, start at 10,000 RPMs and increase as needed. If you’re using it to file down your nails, then start at 20,000 RPMs and increase as needed.
Using the right speed for your nail drill is key to achieving a professional-looking dip powder manicure that lasts. Start at a low speed and gradually increase as needed to get the perfect finish, every time.
How do I avoid overfilling the cuticles with dip powder?
Overfilling the cuticles with dip powder is an issue that commonly arises during a manicure, and it can be both time-consuming and annoying to fix. Fortunately, there are several steps you can take to avoid this issue in the first place.
First, make sure that your nails are prepped correctly before applying the dip powder – clean them, trim them down to the desired shape and length, and file them down until they’re smooth. This will help ensure that the dip powder is applied evenly and that it won’t build up in certain areas, such as around the cuticles.
Second, when applying the dip powder, use a small brush to spread it across each nail in thin layers. This will help prevent excess product from accumulating near your cuticles. Make sure there are no clumps of dip powder left on the brush before moving onto each nail.
Is it necessary to use a base coat when applying dip powder?
Yes, it is necessary to use a base coat when applying dip powder. A base coat helps create a layer of protection between your natural nail and the dip powder, preventing damage to the nail bed. It also helps give your manicure a longer lifespan.
over the entire nail – including the tip and sides – in a thin layer. Allow it to dry completely before moving onto the dip powder application. Additionally, make sure the base coat is free of any oils or creams that could interfere with the dip powder adhesion.
What type of brush should I use to apply the dip powder?
When it comes to applying dip powder, having the right brush is key. The type of brush you use will depend on the look and finish you’re going for – whether it be a matte, shiney, or glittery manicure.
For a matte finish, we recommend using an angled brush with firm bristles. This type of brush will provide precision and accuracy when applying the dip powder, ensuring a smooth and even finish.
For a shiny finish, you’ll want to use a synthetic fan brush made with soft bristles. This type of brush helps spread out the dip powder more evenly and gives the nails a glossy look. When applying, use light strokes with the fan brush to get a smooth finish.
Finally, for glittery manicures, you’ll want to use an angled brush with soft bristles. This type of brush is perfect for lightly dusting on glittery dip powder to create a bold and glittery look. Make sure to apply in light layers.
No matter which type of brush you use, make sure to use only a small amount of dip powder. Applying too much can cause clumping and lead to an uneven finish. Additionally, be sure to clean your brushes after each use – this will help them last longer and prevent buildup of dip powder residue.
Does the size of the nail drill bit matter when using it for dip powder application?
When it comes to using a nail drill for dip powder application, the size of the bit does matter. Depending on the look you’re going for and the type of dip powder you’re using, you’ll want to choose a specific size bit that will help you achieve your desired results.
For example, if you’re looking for a more subtle manicure, then you’ll likely want to use a smaller bit size. This will help ensure that the dip powder is evenly distributed across each nail and that your manicure has a natural, understated look to it.
If you’re going for something bolder, then a larger bit size may be more suitable. A larger bit will help you create an intense color and glittery finish, as well as giving your manicure a statement-making look.
It’s also important to note that different types of dip powder require different sized bits. For example, traditional powdered dip requires a smaller bit in order to create a smooth and even finish. Glittery dip powder, on the other hand, requires a larger bit size to help distribute the particles more evenly and create a more intense look.
Can I use different types of dip powders with the same nail drill?
Yes, you can use different types of dip powders with the same nail drill. However, it’s important to keep in mind that each type of dip powder requires a specific bit size and technique for optimal results.
For instance, if you’re using traditional powdered dip – such as acrylic or gel – then you’ll likely need to use a smaller bit size with light strokes. This will help ensure that the dip powder is evenly distributed across each nail and that your manicure has a smooth, natural finish to it.
On the other hand, if you’re using glittery or metallic dip powders – both of which are more difficult to apply – then you’ll want to switch to a larger bit size and use more aggressive strokes. This will help the particles spread more evenly across each nail and give your manicure an intense, glittery look.

Do you need to dehydrate nails for dip powder?
Yes! Properly dehydrating your nails is a key step for successful dip powder application. Not only does it ensure that the manicure will look its best, but also helps secure the longevity of your mani.
Start by washing and drying your hands, then lightly buffing away any excess cuticle to prep for dehydration. To help remove any moisture left behind, you’ll need an alcohol-based nail dehydrator. This will encourage the powder to stick better and help maximize the wear time of your dip powder nails.
Simply apply a few drops onto the surface of your clean nail, then wait for 20-30 seconds before buffing away any excess moisture with a buffer or lint free wipe. It’s important to note that you should only use it once – applying too much can cause the powder to lift prematurely.
Next, you’ll want to push back any cuticles and remove excess nail plate debris before moving onto the application process. Now your nails are ready for dip powder! Just remember, dehydration is essential for a well-done manicure, so don’t skip this step.
For best results, finish your dip powder manicure with a top coat to protect the nail bed and promote longevity. And there you have it – now you know how to use a nail drill for dip powder like a pro!
How do you shape dip powder nails?
When it comes to shaping dip powder nails, there are a few options. Depending on the desired outcome, you can use various tools such as a file, buffer, and/or nail drill for optimal results.
If you want to shape your nails into a curved or almond shape, start by lightly filing with a 180-grit file until you reach the desired shape. Be sure to only file in one direction, as filing back and forth can cause the nail to become weak or even break.
Once you’ve achieved your desired shape, it’s time to move onto buffing with a buffer. Gently buff away any ridges on the surface of the nail plate. This will help create a smoother base for your dip powder manicure.
For those looking to achieve a sharp, crisp look, you may want to use a nail drill for shaping. A drill can help create the perfect point or curve and provide more precision than a file or buffer. To use it, simply hold the bit lightly against your nail until you reach your desired shape. Make sure not to press too hard – you don’t want to damage the nail plate!
No matter which method you use, be sure to always work slowly and carefully. The goal is a clean, neat manicure that looks professional and lasts long – not one that’s rushed and ends up chipping or breaking.
How often should you remove dip nails?
The answer to this question depends on a variety of factors, such as how often you use your hands and the type of dip powder or product used. Generally speaking, it’s best practice to remove and replenish your manicure every two weeks. This ensures that the nails remain healthy and prevent breakage from overuse or exposure to harsh chemicals.
If you are using a more expensive dip system, it may be possible to go longer between manicures. For example, a higher-end product may last up to three weeks if properly maintained. However, this should only be done after consulting with your nail technician or salon.
Regardless of the type of product used, it’s important to inspect your nails regularly for signs of wear or breakage. If you notice these signs, it’s time to remove the dip powder and start fresh.
Aside from visually inspecting your nails, there are other ways to tell if it is time for a new manicure. Your cuticles may become dry, brittle, or discolored due to exposure to chemicals in dip powder products. Similarly, your nails may become dull or lose their shine over time.
Finally, it’s important to note that while dip powder is designed to last longer than traditional nail polish, no manicure is meant to be permanent. Over time, even the highest-quality products will eventually need to be replenished for best results. As such, it’s important to remember that a manicure can only look its best if you take the time to remove and reapply your dip powder every two weeks.
Does acetone get rid of dip powder?
When it comes to removing dip powder manicures, acetone is one of the best solutions. Acetone is a type of solvent that dissolves and breaks down the products found in most nail polishes, gels, and acrylics. This makes it ideal for both removing dip powder from your nails as well as cleaning up any excess product around the cuticles and skin.
To start, you’ll need to prepare a few items. First, gather your acetone-based nail polish remover and cotton balls or pads. Next, pour some of the solution onto the cotton pad or ball until it is saturated.
Once you have your materials ready, it’s time to remove the dip powder. Start by lightly pressing the cotton pad or ball against each fingernail for 10-15 seconds. This helps break down the product and loosen its hold on your nails. You can also use a cuticle stick to gently scrape away any excess residue, taking care not to scratch or damage the surface of your nails.
Finally, you’ll need to clean and moisturize your hands. After your dip powder has been removed, it’s important to wash your hands with soap and warm water to remove any remaining residue. Once they’re dry, finish up by applying a gentle hand cream or cuticle oil to prevent them from becoming dry and brittle.

How many layers of powder do you need for dip nails?
The number of layers of powder needed for a dip nail manicure varies depending on the specific type of product you’re using, as well as your desired look. Generally speaking, two to three coats of dip powder are usually enough to achieve a full coverage and highly pigmented finish.
For those looking for a more natural-looking manicure, one coat of powder should be enough. If you’re looking for a more dramatic look, however, opt for two to three coats of powder. Remember that if you use multiple layers, make sure they are all completely dry before applying the next coat.
When it comes to the thickness of each layer, most dip powders come with instructions on how thick to apply each layer. It’s important to follow these instructions as the thickness of each layer will have an impact on the durability and final look of your manicure. Generally speaking, a thicker layer of powder will provide more coverage and better protection, while a thinner layer gives you a lighter look and more flexibility in terms of design.
Should I buff my nails before dip powder?
Yes, it’s important to buff and clean your nails before applying any kind of dip powder. First, buff the surface of your nail lightly with a nail buffer or file to remove any oils or dirt that may be on the top layer. This will help ensure that the dip powder adheres properly and lasts for as long as possible.
Then, use a lint-free cloth to apply rubbing alcohol or an acetone-based nail polish remover to clean the nails of any remaining oils. This will help create a clean and dry surface for the dip powder to adhere properly. Once your nails are prepped, you can go ahead and start applying your dip powder.
Conclusion | How to use a nail drill for dip powder?
This article outlines the different types of brushes and bit sizes that should be used when applying dip powder with a nail drill. For a matte finish, an angled brush with firm bristles is recommended; for a shiny finish, use a synthetic fan brush made with soft bristles; and for glittery nails, use an angled brush with soft bristles. Different types of dip powder also require different bit sizes for optimal results, with smaller bits being suitable for traditional powders and larger bits required for glittery powders. Additionally, it is important to always clean brushes after use and apply only a small amount of dip powder to the nails in order to avoid clumping and an uneven finish.