How do you practice with a nail drill? | If you’ve ever wanted to take your DIY nail designs to the next level, then mastering the art of using a nail drill is essential. Using a nail drill isn’t as intimidating as it sounds and with a little practice, you’ll be a pro in no time! So dust off that drill and let’s get practicing! With these helpful tips, you’ll be drilling your way to perfect nails like a pro in no time! Let’s go!
It may look intimidating at first but trust us – it’s easier than it looks and it can really take your nail game to the next level. So let’s get started and get you practicing with a nail drill like a pro! Here are some helpful tips to get you on your way:
1. Get familiar with the drill – Before jumping in, take a few minutes to become acquainted with the tools and its parts. That way, when it comes time to use it during your design process, you’ll know exactly what each part does and how they all work together.
2. Start slowly – When first starting out, keep your speed low and steady so that you can control the outcome of your design better until you’re comfortable at higher speeds.
3. Make sure your nails are prepped properly – Before using a drill, make sure to properly prep your nails by filing and buffing them to create a smooth surface. This will help ensure that your design goes on evenly and looks its best.
4. Choose the right bit – Depending on the job you’re doing, make sure to choose the right bit for the job – whether it’s filing, buffing or polishing. Each bit is designed to do a specific task so be sure you have the right one for what you need.
5. Practice makes perfect – As with most things in life, practice makes perfect! Don’t be afraid to experiment with different techniques and find out which ones work best for you. With enough practice, soon enough you’ll be drilling like a pro!
So, there you have it! With a little practice and these helpful tips, you’ll soon be rocking perfect nails with your trusty nail drill like a pro! Now go ahead and get drilling!
Once you’ve become comfortable with using a nail drill, you can really get creative with your DIY designs. An important factor for achieving the best results when using a drill is to use the correct bit for the job. Different bits do different tasks and it’s important to choose the right one depending on what type of design you are creating.
For filing and buffing nails, the best bit to use is a coarse bit, which will help you shape and even out your nails before applying design. For polishing, you should use a fine bit or a mandrel wheel, which are specifically designed for smoothing and polishing nails. When drilling for acrylic designs, it’s best to start off with a low speed to make sure your drill doesn’t overheat from the friction of the material.
In order to ensure that you can create the perfect nail design, it’s essential to keep your drill and bits clean. Dust and debris can accumulate on the surface of your drill bits over time, which can cause clogging or uneven drilling. To prevent this, make sure to regularly wipe down your bits with a soft cloth after each use. You should also store them in an airtight container when not in use as this will help protect them from dust build up.
Lastly, safety should always be top priority when using a nail drill. Make sure that you are wearing protective eyewear at all times while working with the machine and avoid touching any metal parts during operation as these could become hot during use. Additionally, be sure to unplug the machine when not in use and always keep it away from water.
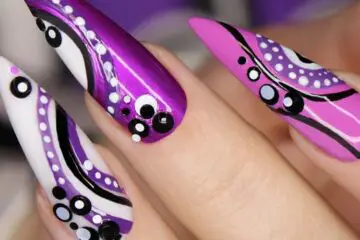
Now that you know the basics of using a nail drill, it’s time to get creative with your DIY designs! There are plenty of ways to spruce up your nails and give them an extra touch of personality. One technique that is especially popular right now is acrylic painting. This look involves using a special type of paint that adheres to the nail bed for longer-lasting results.
To create this look, begin by filing and buffing the nail so that it’s smooth and even. Once prepped, lightly spray some rubbing alcohol onto each nail in order to ensure a good bond between the acrylic paint and the surface (this will also help avoid chipping). Next, choose which colors you would like to use and begin painting the desired design onto your nails. When you’re finished, use a top coat to seal in the design.
If acrylic painting isn’t your thing, there are plenty of other ways to spruce up your nails with a nail drill. Another popular look is using glitter or rhinestones for extra sparkle and shine. To apply these materials, simply select the bit that best matches your desired look and then gently apply each piece of rhinestone or glitter onto the nail bed using either tweezers or a brush. Seal it all together with top coat once you’ve reached your desired level of bling!
Finally, if you’re feeling extra creative, you can also use your nail drill to create 3D designs. By selecting the right bit and working in thin layers, you can easily create any design from butterflies to flowers on your nails. As with applying glitter or rhinestones, make sure to seal everything together with a top coat once complete!
Using a nail drill is an easy and fun way to get creative with personalizing your nails. With practice and patience, anyone can easily create beautiful designs. Just remember be safe as always when using a nail drill and have fun experimenting with different looks! The possibilities are endless! So go ahead and show off those perfect nails in style!
Conclusion | How do you practice with a nail drill?
This article provides information on how to safely and effectively use a nail drill to create personalized designs. It covers topics such as buffing with coarse bits, polishing with fine bits or mandrel wheels, using low speeds when drilling acrylics, keeping bits clean, practicing safety precautions and applying glitter/rhinestones/3D designs. With patience and practice, anyone can easily customize their nails for unique looks.