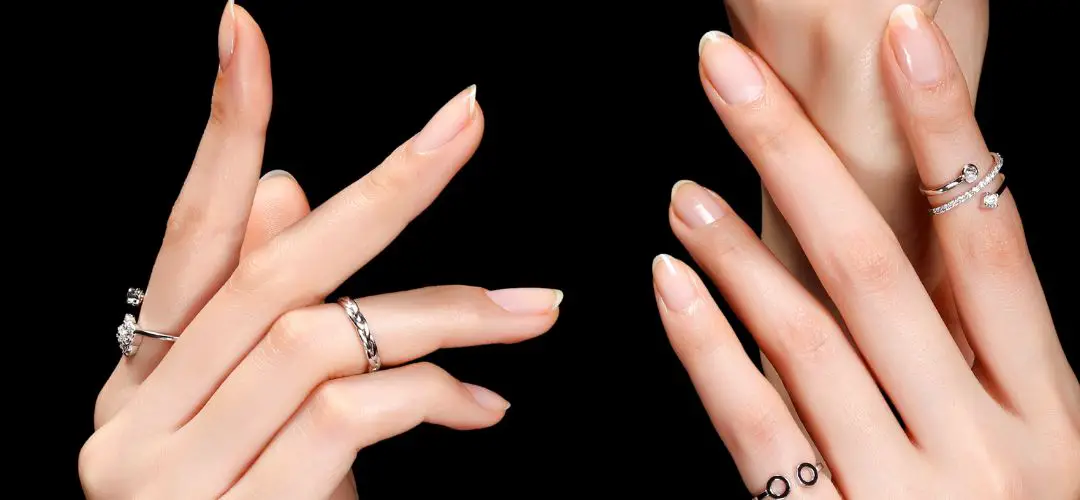
How do you smooth nails with a drill? | You may have thought it was crazy or impossible, but believe it or not – you can use a drill to smooth your nails! No more spending hours filing and buffing them by hand – just grab your trusty drill and get ready for smooth, glamorous nails in no time! In this article we’ll cover everything you need to know about using a drill to give yourself the perfect manicure.
First, you’ll need to make sure your drill bit is the correct size for your nails. You don’t want to use a bit that’s too big or too small – otherwise, it won’t effectively remove any ridges and bumps. Once you’ve chosen the right drill bit, attach it firmly to the end of your drill and then choose a setting that is appropriate for the type of nail filing you’re doing.
Now you’re ready to start filing! Place the drill bit gently against your nail and begin grinding in a smooth, circular motion. Make sure not to press too hard or go too fast.
Once you’ve finished filing all of your fingernails, it’s time to clean up. Carefully remove any excess filings from around your nails with a small brush or cloth and then apply some cuticle oil to help protect them.

Which nail drill bit to smooth nails?
If you use a nail drill to smooth your nails, the best bit to use is a cylinder or barrel-shaped one. This shape allows the bit to glide over any ridges and bumps in the nails with ease, ensuring they are completely smoothed out. It’s important that you replace these bits regularly as they can become damaged from frequent use. The lifespan of the bits also depends on the strength of your nail drill.
On the other hand, some people prefer to use a fine-grained diamond bit for more precise work. This can be useful if you’re smoothing nails with hard acrylic or gel polish. It is also helpful for removing any remaining product which may have been left on the surface after filing. Keep in mind, however, that diamond bits are more expensive than other kinds.
It’s best to experiment with different types of drill bits and find the one that works best for your nails. Always use light pressure when smoothing your nails with a drill bit to avoid damaging them. When you’re done, make sure to apply a nourishing cuticle oil or cream to keep them looking healthy and moisturised.
No matter which type of drill bit you decide to use, following correct hygiene protocols is essential when it comes to nail care. Make sure that your hands are clean before you start filing your nails and always sanitise the bits between uses to avoid transferring any germs or bacteria. With proper care, you can have smooth, healthy nails in no time!
How do I ensure the drill bit is the right size?
The size of the drill bit will depend on how thick and hard your nails are. If you have thick, hard nails, then you’ll need a larger drill bit to effectively reach all of the ridges and bumps. For thinner, softer nails, a smaller drill bit should work just fine. You can also test out different sizes before settling on one – simply attach the bit to the end of your drill and hold it against a fingernail to see if it is the right size.
Do I need a flat surface for stability?
Yes, a flat surface is very important for stability when using a drill for filing.
How long should I spend on each nail?
How long you spend filing each nail will depend on how much ridges and bumps there are to remove. Generally, it shouldn’t take more than a minute or two per nail – any longer than that could damage the nails. Once all of the ridges and bumps have been filed away, you can stop drilling and move onto the next one.
What is the best technique for smoothing nails?
When it comes to filing your nails, the best technique is to use a slow and steady motion while applying light pressure.
Should I use the drill on wet or dry nails?
It’s best to file your nails when they’re dry – this will help ensure that the drill bit does not get clogged up with any moisture or debris. Once you’ve finished filing, you can then apply cuticle oil or moisturizer to keep them healthy and protected.
Is there any way to reduce vibration from the drill?
Yes, there are a few ways to reduce vibration from the drill while filing nails. Firstly, you can invest in an anti-vibration device which attaches to the base of your drill and helps dampen any shaking or vibrations. This will help keep your hand steady and make it easier to control the drill as you file.
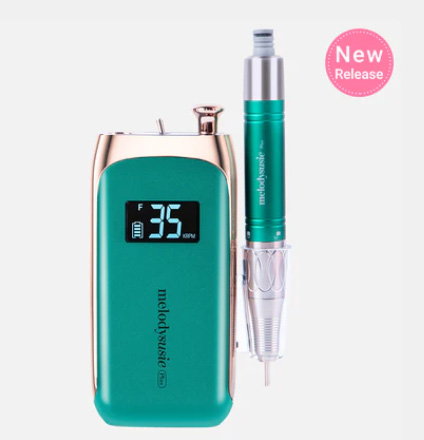
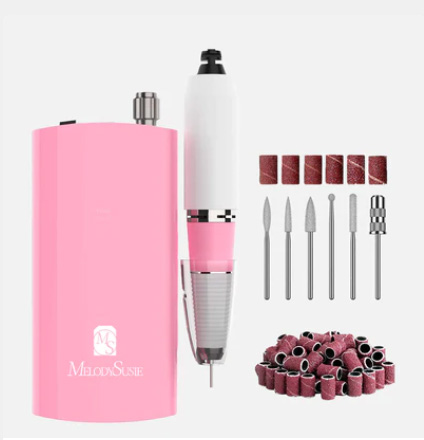
Can a battery operated drill be used for filing nails?
Yes, battery operated drills can be used for filing nails. Battery powered drills are generally lighter weight and smaller in size than corded models, making them easier to maneuver when filing your nails. They also have adjustable speeds so you can choose the right setting depending on how soft or hard your nail beds are.
When using a battery powered drill for nail filing, it is important to keep an eye on the battery level. When the battery starts running low, you’ll need to recharge or replace it as soon as possible – otherwise, the drill won’t work properly and you won’t get a smooth finish on your nails.
Another thing to consider is the type of bit being used with the drill – make sure it’s suitable for use on nails. Generally, a manicure bit with a small and slim blade or cone shape will work best for filing down ridges and bumps.
Should nails be perfectly smooth?
When it comes to DIY projects, using a drill is a great way to take them to the next level. But what if you want smooth nails? Should they be perfectly smooth?
The answer is: It depends! The type of project you’re working on will determine whether or not the nails need to be perfectly smooth. If it’s a work of art or decorative piece, for example, you may want to leave them slightly textured for an interesting look and feel. But if it’s something like building furniture that needs to be held together securely and evenly, then you’ll need to ensure your nails are as smooth as possible.
Fortunately, smoothing out the heads of those pesky nails is surprisingly easy with a drill. All you need is a simple hand-held electric drill and some sandpaper or abrasive pads. The process can be broken down into three steps:
1) Start by drilling the nail head with the correct size bit. Make sure to keep your speed low and steady, as too much force might tear up the surface of the nail head.
2) Once you’ve successfully drilled the nail head, switch out your drill bit for a sanding pad or piece of sandpaper. Use circular motions to smooth out any remaining grooves and bumps in the nail head.
3) Finally, finish up by wiping away any dust or debris from the nail with a damp cloth.
And there you have it! You can now enjoy the satisfaction of perfectly smooth nails that look and feel great.
Why are my nails not smooth?
If your nails aren’t coming out as smooth as you’d like, it could be the result of a few different factors. The first is that you might not be drilling with the right size bit for your project. If the bit is too big, it can cause damage to the nail head and leave unsightly marks or grooves behind. It’s also important to use a slow and steady speed when drilling, as too much force can cause the nail head to deform.
Another common reason your nails might be coming out rough is that you’re not sanding or filing them enough after drilling. If you don’t take the time to smooth out any remaining bumps or grooves, they won’t be perfectly even and could result in a less than ideal finish. To avoid this, use an abrasive pad or piece of sandpaper to ensure that all the nail heads are properly smoothed out before wiping down with a damp cloth.
Finally, the material you’re working on might be contributing to the issue as well. Harder materials like steel or aluminum will require more time and effort to drill and sand than softer ones like wood. If you’re finding it difficult to achieve the desired smoothness, try changing up the material to something more forgiving.
How can I smooth my nails without a filer?
Smoothing your nails without a filer is certainly possible, but it will require more time and effort to achieve the desired results. The first step is to remove any dirt or debris from the nail head with something like a cotton swab. This will help ensure that the surface is clean and smooth for the next steps in the process.
Next, you’ll want to use an emery board or a piece of sandpaper to gently buff out the surface and remove any rough edges. This will help make sure that your nails are even and smooth, rather than having bumps or grooves. Start with a coarse grade paper and gradually move up to a finer grit until you achieve the desired finish.
Once you’ve got your nails to the smoothness you’re looking for, finish them off with a nourishing oil or serum. This will help protect them and maintain their suppleness. You should also apply a cuticle cream to keep the delicate skin around your nails hydrated and prevent cracking.
For those who prefer an alternative to abrasive sanding, there are some products on the market specifically designed to smooth and shape nails without the use of a filer. These products contain active ingredients like panthenol, acetyl glucosamine, and vitamin E that help soften dry cuticles and add shine.
Conclusion | How do you smooth nails with a drill?
This article outlines the best technique for filing nails using a drill, including tips on reducing vibration from the drill and using the correct bit. It also suggests that battery operated drills are a good option for filing nails.