The nail drill is an essential tool for any manicure enthusiast. From filing to polishing, the list of uses is endless! But did you know that it can also be used for thickening nails? That’s right – with a few simple techniques and the right tools, you can make your nails look plumper and more attractive in no time at all.
So if you’re looking for some tips on how to make your nails look more voluminous, read on! We’ll cover the basics of using a nail drill for thickening, as well as recommended tools and precautions. Let’s get started!
The Basics
To thicken your nails with a nail drill, you need to start by buffing the surface of your nails. This will help to create a smooth base for applying any thickening product or tool. Next, choose a buffing attachment and set the drill speed to low. Working in slow, circular motions, gently buff the tips of your nails until they have an even finish.
Once you’re happy with the level of buffing, it’s time to choose a thickening product. There are a few options here, so you’ll need to decide which one is best for you. You can opt for nail glue or nail wraps if you want an instant transformation, or look into thicker gel polish or acrylic powders for longer-lasting results.
Recommended Tools
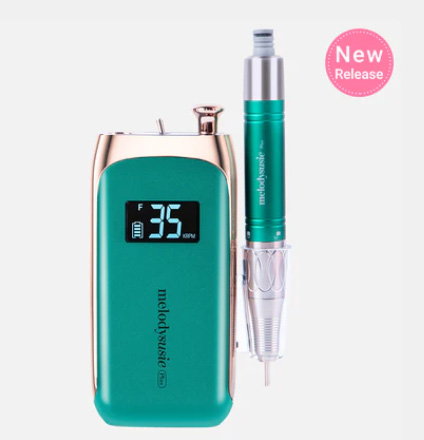
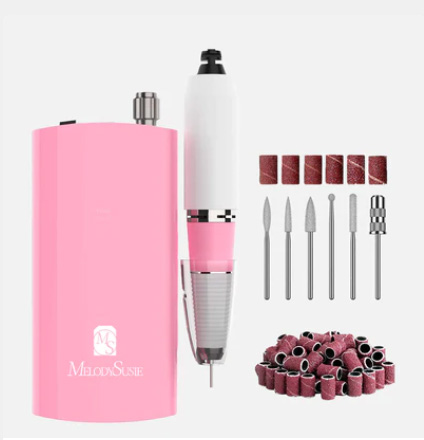
When using a nail drill for thickening, it’s important to use the right tools. Investing in a quality nail drill with multiple attachments is essential, as this will help you achieve the best results. Make sure you also have a buffing attachment on hand, along with a dust brush and vacuum cleaner for easy cleanup.
Precautions
As with any beauty procedure, there are a few precautions to take when using a nail drill for thickening. Be sure to use the lowest speed setting possible and go slowly, as this will help to prevent any damage or discomfort. Start with just one finger at a time until you get used to the process.
It’s also important to make sure your nails are dry before starting, as this will help to avoid any slipping. Additionally, always wear eye protection and choose tools that are designed specifically for use on nails.
Finally, don’t forget to sanitize all of your tools before and after each use! This will ensure that you’re following proper safety protocols while keeping your nails healthy.
So there you have it – now you know how to use a nail drill for thickening! Just remember to go slow, use the proper tools and complete all necessary safety precautions. With these tips in mind, you’ll be able to achieve beautiful, thick nails in no time. Enjoy!
Pros and Cons of Thickened Nails
As with any beauty treatment, there are both pros and cons to thickened nails. On the plus side, they can give you a more polished look and help to make your hands appear younger. Additionally, thicker nails are often less likely to break or chip than thinner ones, which means that your manicure will last longer.
On the other hand, thickened nails may require more maintenance than their thinner counterparts. You may need to use a stronger nail polish remover or acetone to ensure that all of your products are removed completely and in a timely manner. Additionally, the process of thickening nails can be time consuming, so make sure you have enough time set aside for this task before starting.
Overall, thickened nails can help give you a more polished look and provide extra protection for your nails. Just make sure to properly care for them before, during and after the process of thickening in order to get the best results possible. Good luck!
Nail Care Tips After Thickening
Once you’ve completed the nail thickening process, it’s important to take extra care when it comes to nail maintenance. This will help ensure your nails stay strong and healthy.
First, be sure to moisturize regularly. This helps keep the nails from drying out and breaking easily. Additionally, try to avoid contact with harsh chemicals or detergents as much as possible. These can weaken the nail bed and strip away vital moisture.
It’s also important to file your nails regularly in order to keep them from growing too long and becoming brittle. Using a nail drill is great for this task as it allows you to control the amount of pressure being applied, which can help prevent any damage from occurring.
Finally, make sure to always wear gloves when gardening or performing other activities that involve contact with water or harsh chemicals. This will protect your nails from becoming weakened and chipped.
By following these tips, you can help ensure your nails remain thick, strong and healthy for as long as possible. Taking the time to properly care for them now will pay off in the long run!
How often should I use a nail drill to thicken my nails?
When it comes to how often you should use a nail drill to thicken your nails, there’s no one-size-fits-all answer. Generally speaking, it’s best to wait at least two weeks between each session of thickening. This is because the nails need time to adjust and naturally grow back after being thinned or reshaped.
If you’re aiming to thicken your nails quickly, it’s possible to repeat the process every 7-10 days. However, this should only be done with caution as the nail beds may become weakened or damaged if too much pressure is applied. It’s best to start with a conservative approach and gradually increase the frequency over time.
It’s also important to be mindful of the nail drill bit you use, as different types have different effects on the nails. For example, diamond bits are great for shaping and smoothing out ridges, whereas carbide drills are ideal for smoothing out thicker areas. Be sure to consult with a professional if you’re unsure which type of bit to use.
Finally, make sure to always moisturize your nails before and after using the nail drill. This will help keep them hydrated and prevent any further damage from occurring. With proper care, you can get healthy and thick looking nails in no time!
All in all, how often you should use a nail drill to thicken your nails depends on the individual.
Tips for Maintaining Thickened Nails
Once you’ve successfully thickened your nails with a nail drill, it’s important to maintain them in order for the results to last. Here are some tips to ensure your newly thickened nails stay healthy and strong:
- Don’t bite or pick at your nails. This can weakens them and make them more prone to breakage.
- Use a nail strengthener or hardener to keep your nails strong and healthy.
- Avoid using acetone-based nail polish remover as this can damage the protective layer of your nails. Instead, opt for acetone-free removers.
- Wear gloves when washing dishes, gardening, or doing any other activity involving water. This will protect your nails from absorbing any harsh chemicals or bacteria that could weaken them.
- Trim and file your nails regularly to keep them neat and tidy.
- Always moisturize your hands and cuticles with a nourishing lotion or oil, as this helps prevent dryness and peeling of the nails.
- Massage your cuticles with an oil or cuticle cream to keep them hydrated and healthy.
- Avoid using nail hardeners containing formaldehyde as these can damage your nails in the long run.
- Get regular manicures or pedicures to give your nails a nourishing treatment and help keep them strong and healthy.
By following these tips, you can keep your newly thickened nails looking healthy and strong! With the right care, you can enjoy beautiful, lush looking nails for years to come. Good luck!
Taking Care of Your Nail Drill
In order to ensure that your nail drill remains in peak condition and properly thicken nails, it’s important to take care of it. Here are some tips for keeping your nail drill in top condition:
- Make sure to clean the bit after each use with a brush or cloth, as this will remove any residual dust or debris that can interfere with performance.
- Keep your nail drill cool by avoiding prolonged use of high speed settings and heat buildup.
- Regularly lubricate the drill bit to prevent wear and tear on the gears.
- Ensure that your nail drill is stored properly and away from direct sunlight or other heat sources.
- Replace worn out drill bits as soon as possible to avoid damaging your nails.
- If you’re using a corded model, make sure to unplug it after each use.
By following these tips, you can keep your nail drill in good working order and get the most out of it for years to come! Now that you know how to take care of your nail drill, why not give thickening a try? With the right techniques and regular maintenance, you’ll be flaunting perfectly thick nails in no time. Happy thickening!
What type of nail drill should I use for thickening my nails?
When it comes to thickening your nails, the type of nail drill you use will make a big difference. For starters, electric drills are a great choice for thickening as they offer more consistent speed control than manual drills. Electric nail drills also tend to be easier to handle and require less effort when compared to manual ones.
Another important factor is the type of bit you’ll be using. Carbide bits, also known as diamond bits, offer faster cutting and are great for tough jobs like thickening nails. Diamond bits may require a bit more effort to handle due to their hardness, but they also last much longer than standard steel bits when used properly.
If you prefer something a little easier on the hands, ceramic drill bits are ideal. They provide a smoother surface finish than steel and carbide bits and require less pressure to be effective. However, they can wear out quickly if used too often, so make sure to replace them when necessary.
Finally, keep in mind the speed settings of your nail drill. If you’re doing thicker nails, it’s best to stay at a lower speed setting and take your time. This will help you avoid accidentally drilling too far into the nail bed, as well as reduce the risk of damaging delicate cuticles.
How long does the process take when using a nail drill for thickening?
The amount of time it takes to thicken your nails with a nail drill depends on several factors. First, the intensity and skill level you apply to the task will affect how quickly it’s done. For instance, if you’re a beginner, it may take longer than someone who has mastered the process.
The type of bit you use and the speed setting can also determine how long the process takes. As mentioned above, carbide bits require more effort but they are faster than steel or ceramic bits. Additionally, higher speed settings will get the job done quickly but may cause discomfort for those with sensitive hands.
In general, thickening nails with a nail drill will take anywhere between 10-30 minutes, depending on the size of your nails and how thick you want them to be. If you’re doing a full set of nails, it will take even longer.
Another factor to consider is the type of nail product being used for thickening. Gel polishes tend to be thicker than traditional nail polish and require more time to apply evenly.
Conclusion | How do I use a nail drill for thickening?
Thickening your nails can be a great way to give them that extra oomph you’ve been looking for. With the right nail drill, proper technique, and regular maintenance, you can enjoy lush-looking nails for years to come. Don’t forget that nail drills can be expensive, so it’s important to take care of them.
Whether you’re a beginner or an experienced nail artisan, the key is to practice and get comfortable with your nail drill before attempting any thickening techniques. Always start off slow and gradually increase speed until you feel confident in using higher settings. Once you master the basics, you can move on to more intricate designs and nail art.
Finally, remember that proper nail care is essential for maintaining healthy nails. Be sure to keep your nails clean and free of dirt or debris before applying any product. It’s also important to properly store your nail drill in a cool, dry place away from direct sunlight or heat sources.