Have you ever seen a nail artist at work and wondered how they were able to achieve such perfectly shaped nails? Believe it or not, they are using a powerful tool called a nail drill. But what is a nail drill?
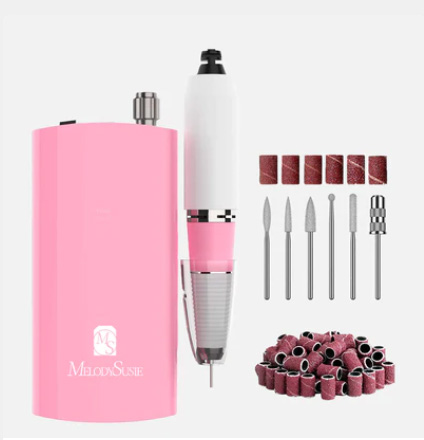
A nail drill is an electric device that spins at high speeds to shape and polish nails. It has different attachments depending on the type of work the user wants to do. For example, if you want to shape your nails, a nail drill can be used with a cone-shaped bit that gently removes excess material from the surface of the nail. If you’re looking for a glossy finish, there are also bits that buff and polish nails.
Nail drills come in both corded and cordless models, so users have the freedom to choose whatever works best for their needs. Cordless drills are great for on-the-go nail artists who need to take their tools with them.
Using a nail drill is relatively easy. Beginners should start by practicing on artificial nails until they get a feel for the device and its attachments. Once you’re comfortable, you can move on to working with your natural nails. Before you start, it’s important to make sure that the drill is properly lubricated so that it runs smoothly and safely.
Are nail drills hard to use?
While nail drills might look intimidating at first glance, they are actually quite simple to use. With a few basic safety tips and some practice runs on artificial nails, you can quickly become a pro nail artist.
The most important thing to remember when using a nail drill is that safety comes first. Make sure that the drill bit you’re using is properly lubricated and not worn down. When working on a person’s nails, it’s important to keep the drill head away from their nail bed as much as possible.
Once you’ve made sure that safety precautions are in place, it’s time to start using the drill. Beginners should practice with artificial nails first since these cause less damage than natural nails if mistakes are made.
If you’re looking for a glossy finish, there are also drill bits that can be used to buff and polish nails once they have been filed down. Before starting on natural nails, make sure you’ve perfected your technique on artificial nails.
When it comes to the actual nail drilling process, there are a few things you should keep in mind. First, make sure you’re using the right bit for the job. Some bits are designed specifically for working with acrylics or gels while others can work with natural nails as well. Secondly, be mindful of the speed and pressure that you’re applying. Too much pressure can damage the nail, so it’s best to start slow and adjust accordingly.
Finally, always make sure that your work area is clean and well-ventilated as nail drill bits can produce a lot of dust. Once you have finished filing down the nails, use a soft brush to remove any residual dust before applying polish or top coat.

How do you use a nail drill without burning it?
Using a nail drill without burning it requires careful attention to the speed and pressure applied. When using a nail drill, always make sure you’re using the right bit for the job and that it is properly lubricated before use.
Beginners should practice with artificial nails first since these cause less damage than natural nails if mistakes are made. Start at a low speed and gradually increase as you become more comfortable with the tool. Make sure to keep your hand steady when applying pressure, as this will help prevent any burning or chipping of the nail surface. When drilling into acrylics or gels, it is important to make sure that the bit is kept in constant motion so that it does not heat up too quickly and cause burning.
It is important to pay close attention to the temperature of the bit while drilling, as prolonged exposure at high temperatures can cause damage to the nail plate or even breakage of the bit itself. If you find that your bit is getting too hot, it is best to take a short break and let it cool down before continuing with your work.
How do I know when to replace my nail drill bits?
Knowing when to replace your nail drill bits is important for achieving the desired results without damaging your nails or the bit itself. Regularly maintained and properly used drill bits can last up to six months, but it is always best to inspect them regularly before use.
If you hear a grinding noise coming from the bit while drilling, this can be an indication that the bit is either worn down or clogged with filings. If this is the case, using it can damage both your nails and the bit itself. Similarly, if you notice any chips in the tip of the bit or rust forming on its surface, these are signs that it needs to be replaced.
If you have been using a particular nail drill for some time, it is a good idea to replace all of the bits after a certain amount of time. This will ensure that all of the bits are working properly and not excessively worn down. It is also important to clean the drill regularly as dust, dirt, and filings can accumulate and cause damage to the bit over time.
When purchasing new nail drill bits, make sure to select ones that are designed for your particular drill. Different types of materials, such as ceramic, diamond, and tungsten carbide require different bits that can handle the heat generated by their use.
Are all nail drills the same?
No, all nail drills are not the same. Each drill is designed with different features and capabilities that make them suitable for specific uses and projects.
The most basic type of nail drill is the rotary drill, which operates by spinning a bit at high speeds to remove material from the surface of a nail or other workpiece. This type of tool is best used for light-duty tasks, such as filing or polishing nails.
Rotary drills are available in corded and cordless models, with the latter being more convenient for use at a salon or spa. This type of drill typically includes interchangeable bits that can be changed quickly and easily to accommodate different nail types.
Other types of nail drills include the reciprocating and the orbital drill. The former operates by moving a bit back and forth rapidly to file, shape, or sand nails while the latter is best used for polishing and buffing as it moves in an oval-shaped orbit. Reciprocating drills are usually bigger than rotary drills and are designed for heavy-duty tasks that require more power.
What to look for when buying a nail drill?
When shopping for a nail drill, you’ll want to first consider the type of work you plan to do with it. Do you need something that is lightweight and easy to use for filing and buffing nails? Or will you be doing more complex tasks such as shaping, sanding, or cutting? Knowing the answer to this question will help narrow down your choices.
In addition to the type of work, you should also consider the power rating, speed options, and other features such as adjustable torque settings. A drill with a higher power rating will be able to handle more demanding tasks, while one with multiple speed settings will allow you to adjust its performance for different types of jobs.
Conclusion | How does a nail drill work?
With the right information and tools, using a nail drill is simple and can help you create beautiful manicures quickly and safely. To ensure that your drill lasts for as long as possible, it is important to regularly maintain it by replacing bits when needed and cleaning it after each use.