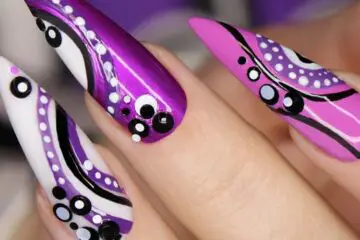
Tired of the same old manicure? Looking for something a little more daring and unique? Well, if you’re willing to switch things up a bit and try something new, press-on nails are perfect! They offer an alternative way to get your mani game on point without having to commit to long-term nail designs. So if you’re ready to learn how to make press on nails from home, read on! We’ll show you the steps and provide some tips on getting it done right. Let’s go!
First, you’ll need to gather your supplies. You’ll need nail glue, press on nails of your choice (you can find some great options at beauty supply stores or online), and a nail file. To get the perfect fit for your nails, measure them using a ruler or measuring tape and make sure the sizes match up with the press-on nails you have chosen.
Now it’s time to start applying! Begin by filing each nail down with a nail file to make sure that the surface is smooth. This will ensure that the press-on nails adhere properly. Afterward, apply a thin layer of glue over each natural nail before sticking on the press-on version. Make sure to line it up in such a way that the press-on nail covers your entire natural nail. Once you have all of your nails in place, use a cuticle stick to press down firmly and ensure that they are secure.
How to measure nails?
Measuring your nails is a vital step in the process of making press-on nails. To get the perfect fit, use a ruler or measuring tape to measure each nail before choosing the right size of press-ons. Make sure to take into account any ridges or irregularities on your natural nails when measuring as well! Once you have determined which size would be best for each one, you can then proceed with the rest of the steps.
How to attach press-on nails?
When attaching press-on nails, it’s important to make sure that the surface of your natural nail is smooth and free from any ridges. Start by filing down each one with a nail file, then apply a thin layer of glue over them before sticking on the press-on version. Make sure to line it up in such a way that the press-on nail covers your entire natural nail. Finally, use a cuticle stick to press down firmly and ensure they are secure.
How to shape and file press-on nails?
Once you have all of your press-on nails in place, you can begin to shape and file them as desired. Start by filing down any ridges or irregularities on your nails first, then use an emery board or fingernail clippers to trim away any excess length. Finally, finish off with a shine block buffing tool to give your press-ons a beautiful glossy finish!
What is the drying time?
To ensure that your press-on nails adhere properly and don’t come off, it’s important to let them dry for at least an hour before removing any excess glue with a cotton swab. This will give the glue plenty of time to set and secure your nails in place. Afterward, you can then proceed with shaping and filing as desired until you get the perfect look!
What tools for shaping/filing?
When shaping and filing your press-on nails, it’s important to use the right tools. Start by using an emery board or fingernail clippers to trim away any excess length and ridges on your nails. Then, finish off with a shine block buffing tool to give your press-ons a beautiful glossy finish! This will ensure that you get the perfect look every time.
What’s the best way to remove?
The best way to remove press-on nails is by soaking them in warm water for 10 minutes and then gently peeling them off. Make sure not to pull too hard – if you find it difficult, try applying some oil or lotion around the edges of each nail before removing them. When done correctly, your natural nails will be left looking just as good!
Are press-on nails durable?
Yes, press-on nails are very durable when applied correctly. To ensure that they stay on for as long as possible, make sure to use a quality glue and let them dry completely before removing any excess adhesive with a cotton swab. With the right care, your press-ons can last up to two weeks!
Should you use top coat sealer with press-ons?
Yes, it is recommended to use a top coat sealer with press-on nails. This will help keep the color and design from fading and also make them more durable. Make sure to apply a thin layer of sealer after shaping and filing your nails for best results.
Does the size of press-on nails matter?
Yes, the size of press-on nails does matter. To get the best fit, make sure to measure each one of your natural nails and use those measurements as a guide when choosing the right sizes for your press-ons. Use a nail file on your natural nails if necessary and make sure to line up the press-on versions accordingly for a perfect fit.
Are press-on nails reusable?
Yes, press-on nails can be reused multiple times depending on how well they are taken care of. To ensure that your set lasts longer, use a top coat sealer every time you apply them and store them in a dry place when not in use. With proper maintenance, you can enjoy your favorite designs for more than one mani session!
Do I need to soak my natural nails before applying press-ons?
No, soaking your natural nails is not necessary before applying press-ons, however it is beneficial as it helps to remove any oils or dirt that might prevent the glue from adhering properly. If you do choose to soak your nails, make sure to thoroughly dry them afterward before applying the press-ons for best results.
Which types of adhesive work best with press-ons?
The best type of adhesive to use with press-on nails is one specifically made for artificial nails. This will ensure that the glue bonds properly and securely holds your nails in place. Make sure to read the instructions on the package before using any type of nail glue or adhesive, as some products may require specific steps for application.
Conclusion | How to Make Press on Nails?
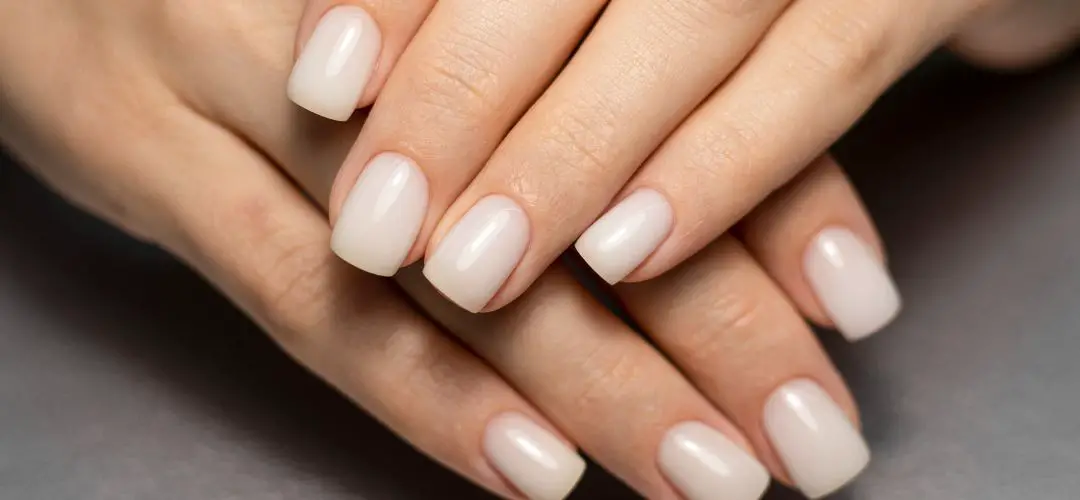
Press-on nails are an easy and cost-effective way to get a salon-quality manicure in the comfort of your own home. To ensure they stay on for as long as possible, use quality glue and top coat sealer, making sure to measure each nail carefully and trim away any excess length or ridges. With proper care, you can enjoy beautiful press-on nails for up to two weeks!