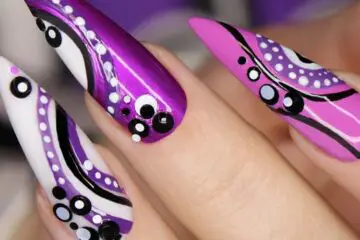
How to apply glitter to nails | Ah, glitter! It’s the perfect way to add a bit of pizzazz and sparkle to your nails. Whether you’re looking for a subtle shimmer or an eye-catching shine, adding glitter is an easy way to glam up your mani. But how exactly do you apply it? With these simple tricks and tips, we’ll show you how to add a sprinkle of glitter to your nails like a pro! Let’s get started.
How do I apply glitter to my nails?
You’ll need a few basic supplies for this project: nail polish, glitter, and top coat. (Note: when purchasing glitter, make sure to get the kind that’s specifically made for nails – not just any old craft glitter!) First, paint your nails with a base color of your choice. Then, spread a thin layer of clear top coat on each nail. Next, sprinkle a generous amount of glitter onto the wet surface and gently press it down with a finger or an orange stick. Once you’ve added enough glitter for your desired effect, follow up with another layer of top coat to secure the design in place.
What type of glitters should I use?
When picking out glitter, your options are truly endless! You can choose from chunky glitters and holographic shades to fine dusts and micro-glitter particles. Experiment with different types of glitter and have fun creating unique looks!

Is it difficult to apply glitter to nails?
Not at all! Applying glitter to nails is actually quite easy. Just make sure you start with a base color and top coat, then sprinkle the glitter onto your wet nails and press gently. Finish it off with another layer of top coat to seal in the design. With these simple steps, you’ll be able to add a little sparkle to your mani in no time!
Should I use a top coat when applying glitter?
Yes! Applying a top coat before and after adding glitter is essential to make sure the look lasts. It will also help keep your nails looking neat and polished, even when there’s glitter on them. So don’t forget to come prepared with some clear topcoat before you start working with glitter.
Will the glitter stay on for long?
Yes, with the right technique and supplies, glitter can last for days without any problems. Just make sure that you use a good quality nail polish, top coat, and glitter to ensure a long-lasting look. With the proper techniques and products, your mani will stay sparkly and fabulous!
Are there different sizes of glitters available?
Yes! From chunky glitters and holographic shades to fine dusts and micro-glitter particles, you can find a variety of sizes when it comes to glitter. So don’t be afraid to experiment with different types of glitters to get the perfect look for your nails. If you’re going for a subtle shimmer, choose smaller sized glitters. But if you want to create an eye-catching design, larger glitters will do the trick!
Should I use a sponge to apply glitter on my nails?
No, a sponge is not the best way to apply glitter to your nails. Sponges can absorb and hold on to too much product, leading to clumping and an uneven application. Also, the trickier shapes of glitter can stick in the pores of a sponge, which makes it difficult to get an even distribution when applying them onto your nails.
Instead of using a sponge, why not try using an eyeshadow or paint brush? They have stiff bristles which make them perfect for picking up small pieces of glitter and evenly distributing them across your nail beds. You can also use tweezers or special tools specifically designed for working with glitter if you want more precision and control over your design.

Can I mix different colours of glitters together?
Absolutely! In fact, mixing and matching different colours of glitters is a great way to create unique looks that no one else will have. You can start by choosing two or three coordinating shades to create an ombre effect – for example, a soft pink blended into a shimmery purple with some silver accents. Or you can use several contrasting glitters to create something more vibrant and eye-catching like bright blues and oranges. When it comes to combining different sizes of glitter, this is also possible but should be done sparingly. For instance, if you’re using large chunky particles, try pairing them with fine dusts rather than other larger chunks as the combination might look too busy. If you want more texture in your design, you can add some holographic glitters for a touch of extra sparkle.
Is it possible to use glitter on artificial nails?
Yes, you can definitely apply glitter to artificial nails! Artificial nails provide a great canvas for showing off your glittery creations. The key is to make sure that the glue used to attach the tips or strips of acrylic are completely dry before applying any product.
When it comes to actually applying the glitter, the same principles still apply as when using regular nail polish – meaning you want to start off with a thin layer and build up gradually until you get the desired effect.
What is the easiest way to remove glitter nail polish?
Removing glitter nail polish can be quite a challenge – after all, those tiny specks of sparkle seem to cling on for dear life! As long as you have the right tools in hand, though, it doesn’t have to be a daunting task.
The first step is to soak your nails in warm water and soap for 5-10 minutes. This helps to loosen the glue that holds the glitter in place, making it easier to remove. Once your nails are nice and soft, use a cotton pad soaked with nail polish remover to gently wipe away the glitter – but make sure you don’t scrub too hard or you’ll risk damaging the surface of your nails! Alternatively, you can also try using an acetone-based remover for tougher glitter.
If you want to take a more eco-friendly approach, try using a cotton ball soaked in olive oil and then follow up with a few drops of lemon juice to help break down the stubborn glitter.
Is glitter nail polish harder to remove?
Compared to regular nail polish, glitter is definitely harder to remove. Nail polish removers contain powerful solvents that are able to break down the glue which holds the glitter particles together, but it takes a bit longer for them to work their magic on glitter.
The best thing you can do is give your nails plenty of time to soak in warm water and soap, which will help to loosen the glue that holds the glitter in place. After your nails are nice and soft, use a cotton pad soaked in nail polish remover or an acetone-based remover (for tougher glitter) to gently wipe away the sparkles.

Why is glitter so hard to remove?
Glitter is incredibly stubborn because it’s made up of tiny particles of reflective material (usually plastic) that are held together by a strong adhesive. This makes it hard to break down with water or other solvents and can make removing it from surfaces like nails and clothing a real challenge!
What other tips do you have for removing glitter?
There are a few other tricks you can use to help remove stubborn glitter. For instance, Vaseline can be used to break down the adhesive that holds the tiny particles together, making it easier to wipe them away with a damp cloth.
You can also try using rubbing alcohol or coconut oil; both have been known to effectively dissolve glitter glue and make it easier to remove.
How many layers of glitter nail polish?
We recommend only applying one layer of glitter nail polish. Applying multiple layers can cause the particles to become too thick and clumpy, making it harder to remove.
To get the most out of your manicure, be sure to use a base coat before you apply any glitter product and apply two coats of clear topcoat after your glitter is in place. This will help ensure that your manicure stays on longer and looks fresh!
How do you remove glitter from acrylic nails?
Removing glitter from acrylic nails can be a bit tricky, but it is doable. The first step is to use a nail file or buffer to gently buff away the top layer of your nail polish, which will help loosen the glue that holds the glitter in place.
Once your nails are nice and soft, use an acetone-based remover (like nail polish remover) to help break down the glue and further loosen the glitter. You can also use a cotton swab dipped in rubbing alcohol, or even regular white vinegar, for extra-tough spots.
Once you’ve gotten as much glitter off as possible, use a nail brush to scrub away any remaining particles. Finish up by washing your hands with soap and water to remove any residue.
Now you’re ready for a fresh, sparkly manicure! Whether you use glitter nail polish or opt for sequins, stars, or rhinestones, your nails will look amazing and sure to draw attention.

How do you make glitter nail polish look good?
The key to making your sparkly manicure look its best is all in the application. Start by filing and buffing your nails to give them a smooth surface. Then, apply a base coat before you get started with the glitter polish. This will keep your nail beds healthy and help ensure the longevity of your manicure.
Once you’ve applied the glitter nail polish, use a brush to pat down any bubbles or uneven areas. You can also use a top coat in order to make your manicure last longer and add extra shine.
When it comes to sparkly nails, the possibilities are endless! Whether you want something subtle or an all-out disco look, there’s a glitter nail polish to fit every occasion.
Does glitter nail polish dry faster?
The short answer is yes, glitter nail polish does tend to dry faster than regular polishes. This is because the larger particles require less time for the polish to adhere and harden on your nails.
That being said, it’s still important to be patient with your manicure. Give it at least five minutes before moving on to any other activities, such as typing on your phone or putting on jewelry. This will ensure that the glitter polish has enough time to set in place and won’t smudge or chip easily.
Remember: a little extra patience goes a long way when it comes to achieving a flawless sparkly manicure!
Am I too old to wear glitter nail polish?
Absolutely not! Glitter nail polish looks great on all ages, and there’s no age limit to having fun with your nails. Whether you’re in your 20s or 60s, you can rock a glittery manicure with confidence.
Choose a shade that matches your style and personality, and don’t be afraid to experiment with different looks. Whether you’re going for something subtle or a bold statement, there’s a glitter nail polish out there for everyone!
Can you make your own glitter nail polish?
Yes, you can make your own glitter nail polish with just a few simple ingredients. All you need is clear nail polish, a variety of glitters, and some patience!
Start by mixing the sparkles into the clear nail polish in a bowl until you achieve your desired look. Then transfer the mixture into an empty bottle and let it sit for 24 hours so the glitter can properly mix with the polish.
Once your new glitter nail polish is ready, you can apply it to your nails like any other nail polish and enjoy your unique design! Just have fun with it and don’t be afraid to experiment. Who knows – you might even create a revolutionary look that will take the beauty world by storm!
How do you drag glitter on your nails?
If you’re looking to try out a more creative glitter nail design, then dragging is the way to go. To start, apply your base coat and two coats of colored nail polish before using a makeup sponge or brush to dab glitter onto the nail.
Using either your finger or a brush, gently “drag” the glitter from the cuticle to the top of the nail in a uniform pattern. To finish, add one or two coats of a clear top coat and you’re good to go!
Don’t be afraid to play with different shades and textures – that’s what makes this look so much fun! And remember: practice makes perfect, so don’t worry if you make a few mistakes in the beginning.
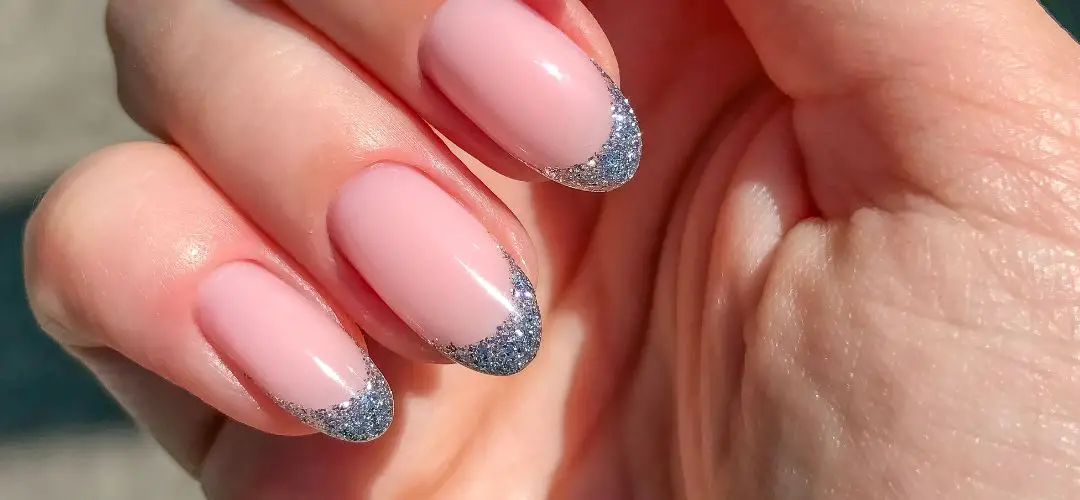
What tools should I have for glitter nail art?
If you’re looking to get creative with your glitter nails, here are a few must-have items:
- Nail Glue – Use this to apply loose glitters and sequins before adding any top coat.
- Makeup Sponges – These are great for evenly distributing glitter across your nail. Additionally, you can use a sponge to mix different glitters or make gradients.
- Tweezers – Perfect for picking up small pieces of glitter or sequins and placing them in the exact spot you want on your nails.
- Glitters and Sequins – Get a variety of colors, sizes and textures to experiment with different looks.
- Topcoat – A good quality top coat will keep your design in place for days – even when it comes into contact with water!
What is the difference between nail glitter and regular glitter?
Nail glitter is designed to be used specifically for beauty applications and, as a result, it’s made from smaller particles than regular craft glitter. Nail glitter won’t clump or create lumps in your manicure, so it gives a much smoother finish. Regular craft glitter is thicker and can be difficult to apply evenly on the nail.
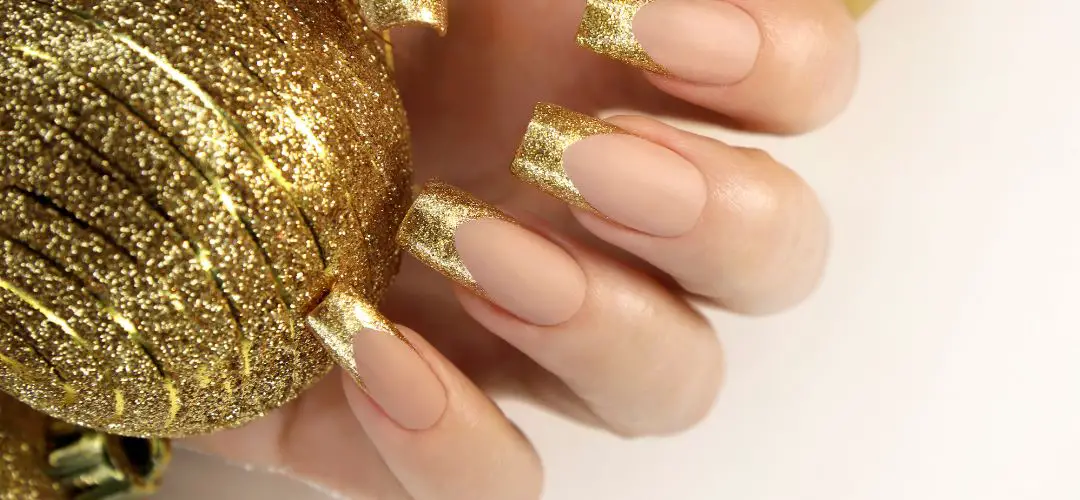
How do you get gold glitter nails?
For a stunning gold glitter look, start off by applying a clear base coat to your nails. Once the base coat is dry, use tweezers to pick up small pieces of golden glitter and apply them directly onto the nail. You can also use makeup sponges for bigger chunks of glitter or to create gradients. Finally, seal everything in with one or two layers of top coat. Voila, you’ve got glittery golden nails!
How do you apply glitter to gel nails?
Applying glitter to gel nails is an easy way to spruce up your manicure. Start off by applying a thin layer of clear gel nail polish and curing it in the UV lamp for two minutes. Next, use tweezers or a makeup sponge to apply the glitter directly onto the nail surface. Seal everything in with another thin layer of clear gel polish and cure it in the lamp again. The result? Shiny and sparkly nails that will last for days!
Can you add glitter to clear nail polish?
Yes! This is a great way to make your own glitter polishes without having to buy expensive pre-made ones. All you need is some clear nail polish and the type of glitter you want to use. Start off by adding a few drops of clear nail polish into a bowl, then slowly add in the glitter until it reaches the desired amount. Stir everything together and then apply directly onto your nails. Seal everything in with a layer of top coat and you’ll be left with gorgeous glittery nails!
How do you sprinkle glitter evenly?
For an even application of glitter, start off by applying a thin layer of clear base coat to your nails. Next, use tweezers or a makeup sponge to sprinkle the glitter onto your nails in an even manner. To make sure that all areas are covered, you can use a fan brush or your fingers to gently press down the glitter into place. Finally, seal everything in with one or two layers of top coat. Now you have evenly sprinkled glitter nails!
What type of glue should I use for glitter?
If you are going to be applying glitter onto your nails, then the best kind of glue to use is a nail glue. This is because it is designed to adhere to the natural nail bed and provide a long-lasting bond. To apply the glitter, start off by applying a thin layer of nail glue onto your nails then use tweezers or a makeup sponge to sprinkle the glitter onto your nails in an even manner. Finally, seal everything in with one or two layers of top coat and cure it under a UV lamp for two minutes. Now you have beautiful and long-lasting glittery nails!
How can I make my nail art last longer?
To make sure that your nail art lasts for as long as possible, start off by prepping your nails before applying the design. This includes buffing, shaping and pushing back the cuticles to create an even surface. Next, use a base coat before you apply any colour to your nails, as this will help the polish adhere better and last longer. Finally, make sure to seal everything in with a top coat every few days and reapply if necessary.
How do you apply holographic glitter to nails?
Applying holographic glitter to your nails is actually quite easy! Start off by painting on a layer of clear base coat to your nails and let it dry. Next, use tweezers or a makeup sponge to sprinkle the holographic glitter onto your nails in an even manner. To make sure that all areas are covered, you can use a fan brush or your finger to gently press down the glitter into your nails. Finally, use a fast drying top coat to seal in the design and you’ll have beautiful holographic nails!
Why does glitter nail polish peel off?
Glitter nail polish is more likely to peel off if the base coat and top coat are not applied correctly. The base coat helps the polish adhere better and ensures a strong bond between the two layers. The top coat also helps to protect the design from chipping or peeling, as it seals in all of the glitter particles. To make sure your glitter nails stay intact, always use a base coat and top coat when applying glitter nail polish!
What can I do to make my glitter nails sparkle?
To make your glitter nails really stand out, try adding a base colour or light shimmer underneath. This will help the glitter particles pop, as well as give your manicure an extra bit of depth. You can also add a layer of clear top coat over the glitter for an extra glossy look and shine! There are lots of ways to make your nails sparkle, so have fun experimenting with different colour combinations.
How do you apply glitter polish without a sponge?
If you don’t have a makeup sponge, you can still apply glitter nail polish without it. All you need is tweezers or a small brush to sprinkle the glitter onto your nails. Make sure to be careful when handling the glitter, as it can easily spill and make a mess!
Conclusion | How to apply glitter to nails
This article provides tips on how to apply glitter to nails, including what tools to use and how to mix different colours for unique looks. It is possible to use glitter with artificial nails, but it’s important to make sure that the glue used is completely dry before applying any product. For best results, use tweezers or special tools specifically designed for working with glitter, and start off with a thin layer and build up gradually until you get the desired effect. With some patience and creativity, you’ll be able to create amazing glitter manis in no time! So go ahead and have fun experimenting with different glitters and techniques!
